
December is finally here! If you haven’t already started counting down the days until Christmas, now’s the time to start. What better way to kick off the season than with decorating a gingerbread house or twenty?
I love decorating gingerbread houses, but it’s an activity that I rarely seem to find the time for. Each Christmas I always plan to make and decorate one, but then I realize I literally bake 1,000 other cookies leading up until Christmas. I don’t have time to make an entire cookie house as well!
This year was different though. I was determined to decorate at least one gingerbread house, so I made a concerted effort to block off a weekend dedicated to baking and decorating. I made a big batch of gingerbread (using the same recipe I used to make these Wookie Cookies earlier this year), and I ended up making not one, but TWENTY ONE gingerbread houses! Granted they are miniature gingerbread houses, but still…that’s a lot of tiny houses!
This project likely wouldn’t have happened if it weren’t for the most brilliant cookie cutter ever invented. This thing has been sitting, sadly unused, in my cupboard for probably close to a decade. With one single press, this bad boy will cut all the pieces you need to make a perfect mini gingerbread house.

This cookie cutter is the ultimate in efficiency. It’s designed so that all the pieces are butted right up against each other. That way there are no wasted scraps in between. Pure genius!
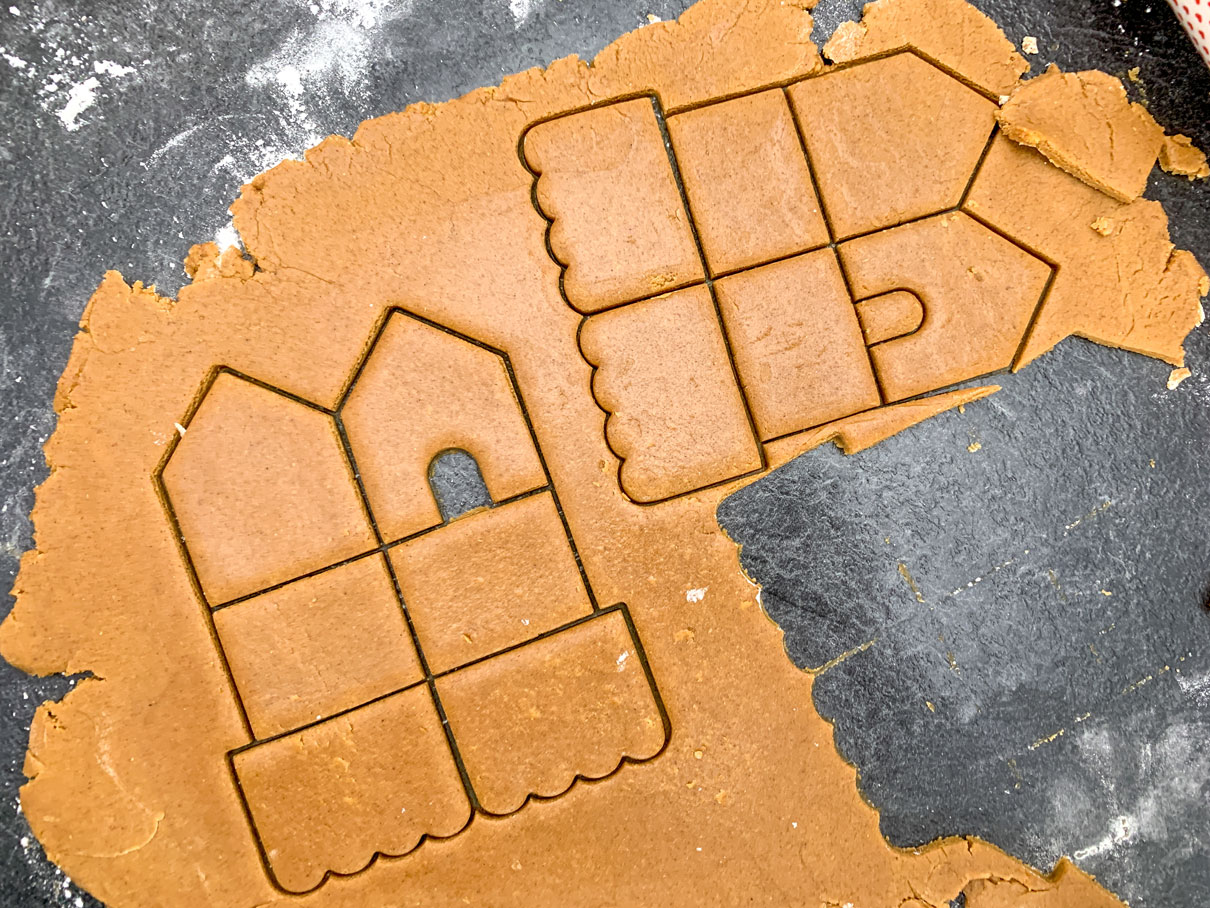
I hadn’t really thought about how many houses I would make when I started baking. I simply mixed up a batch of gingerbread dough and started cutting until all the dough was used up.

I was able to fit enough pieces to make four houses on each baking tray. Each tray took about 10 minutes to bake, so it took about an hour to bake all the pieces in total.
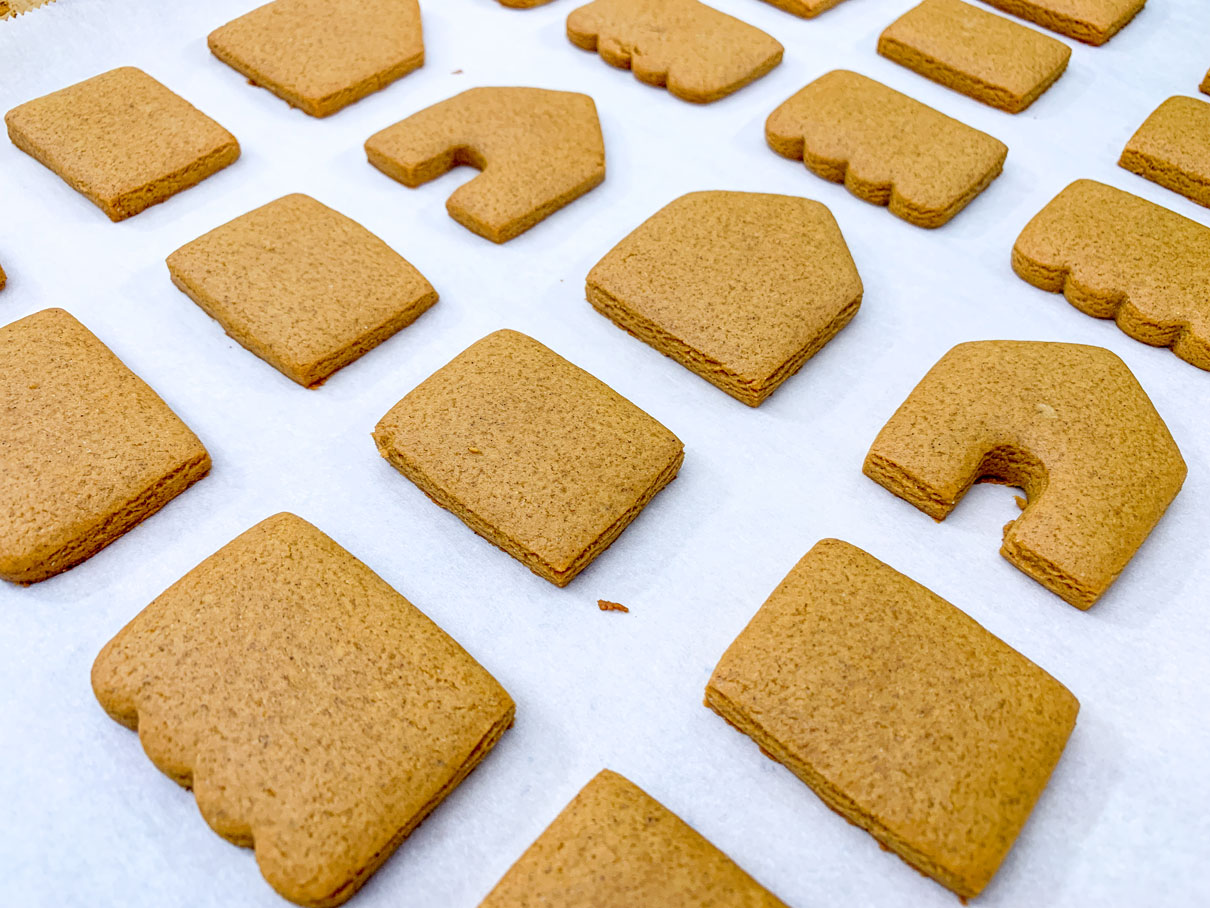
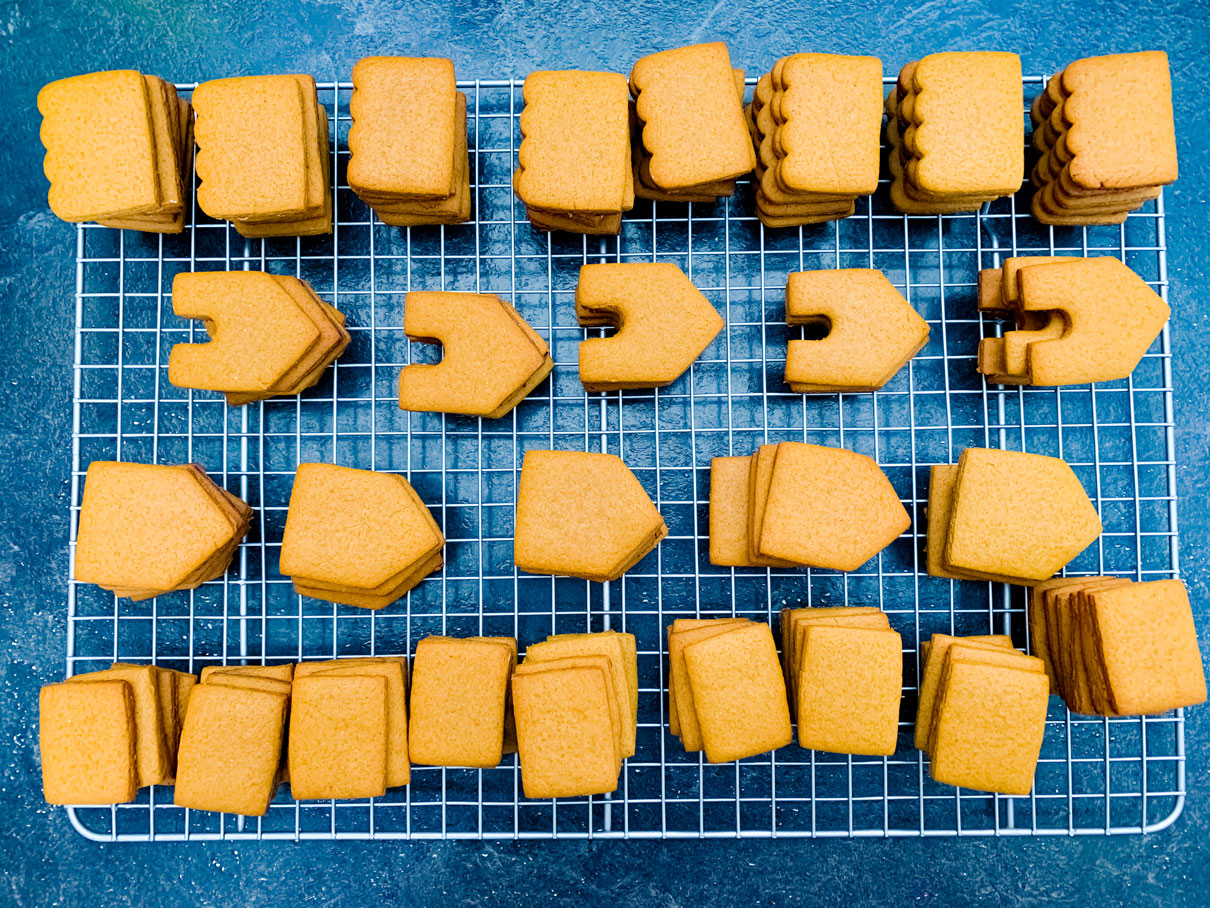
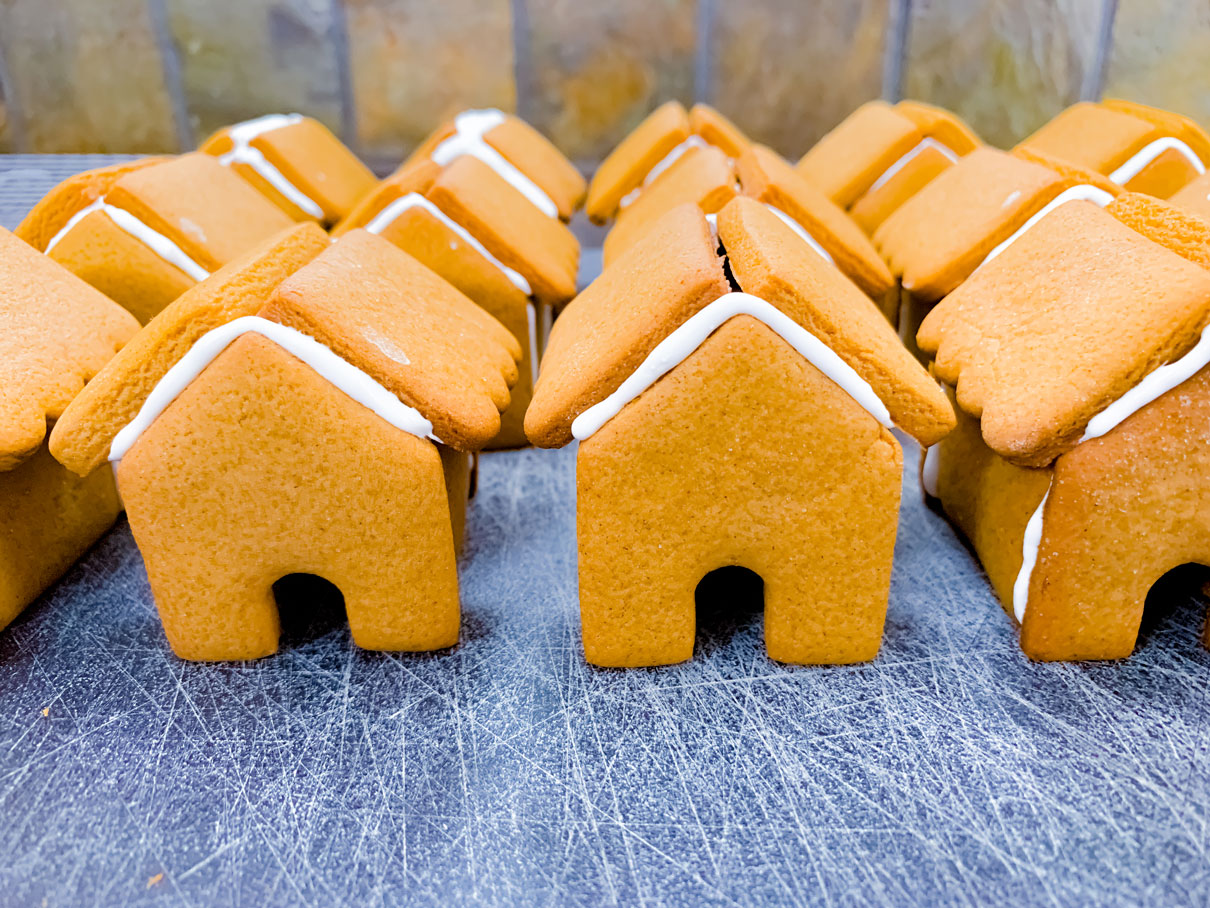
Once all the pieces were cooled, I stacked them into little piles and started an assembly line of gluing them all together.
I started by sticking together all four sides of the houses with royal icing. By the time I got to the last house, the icing on the first one was pretty much set, so I started adding the roof pieces next.
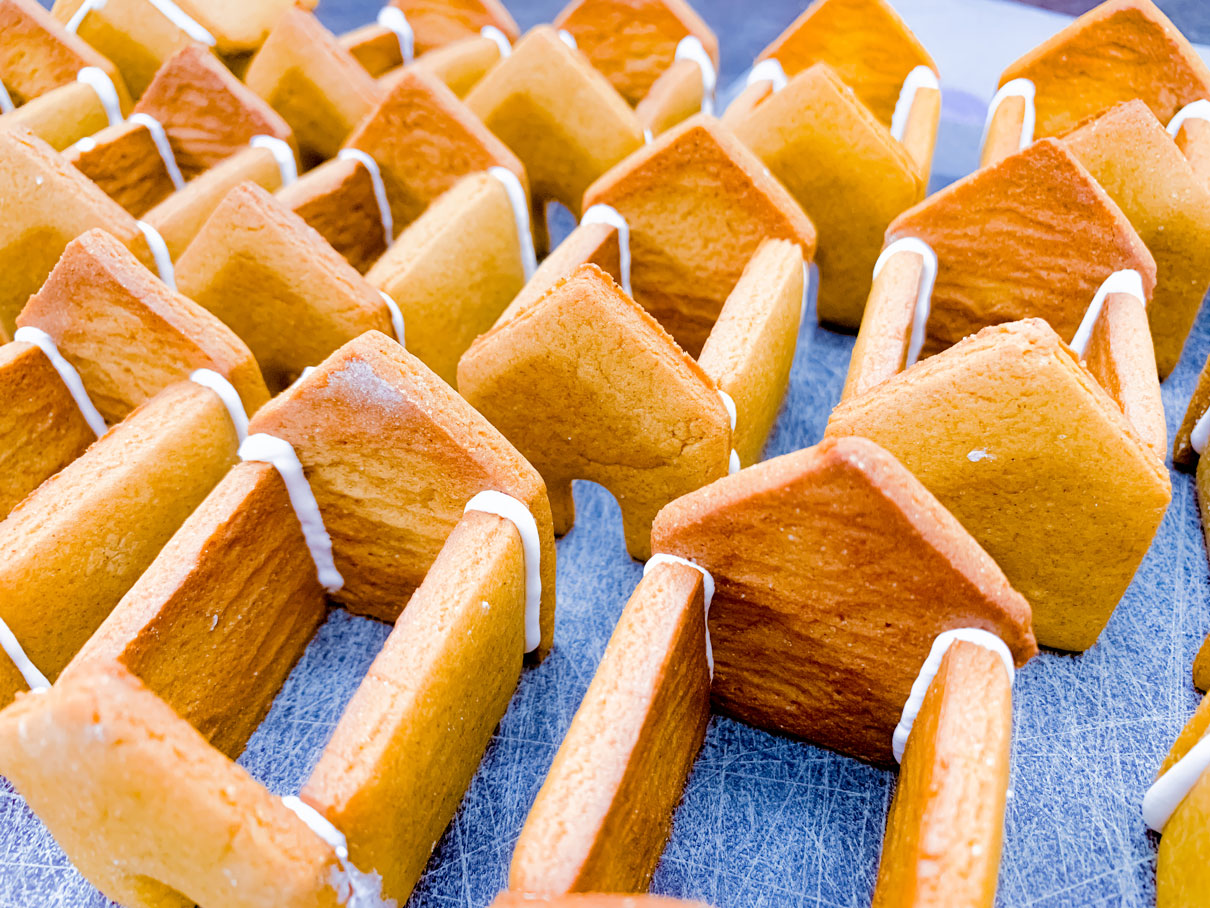
I recommend letting the sides of your house set for ten minutes or so before attempting to attach the roof. It will greatly decrease your chances of a house collapse if the base has a bit of time to firm up.
After attaching all the little house tops, I went to town decorating! I kept the frosting colours fairly simple, sticking to white, red and green. I added sprinkles to some houses, but mostly played around with piping techniques.

What I enjoyed most about decorating a bunch of little houses, as opposed to one big one, is that I always have a hard time deciding what style of house to decorate. I like to experiment with different icing patterns and techniques, but if you’re only decorating one house, you have limited options. You only have one roof. You only have four walls! Your canvas is limited! But with twenty-one miniature gingerbread houses, you can make each one totally unique!
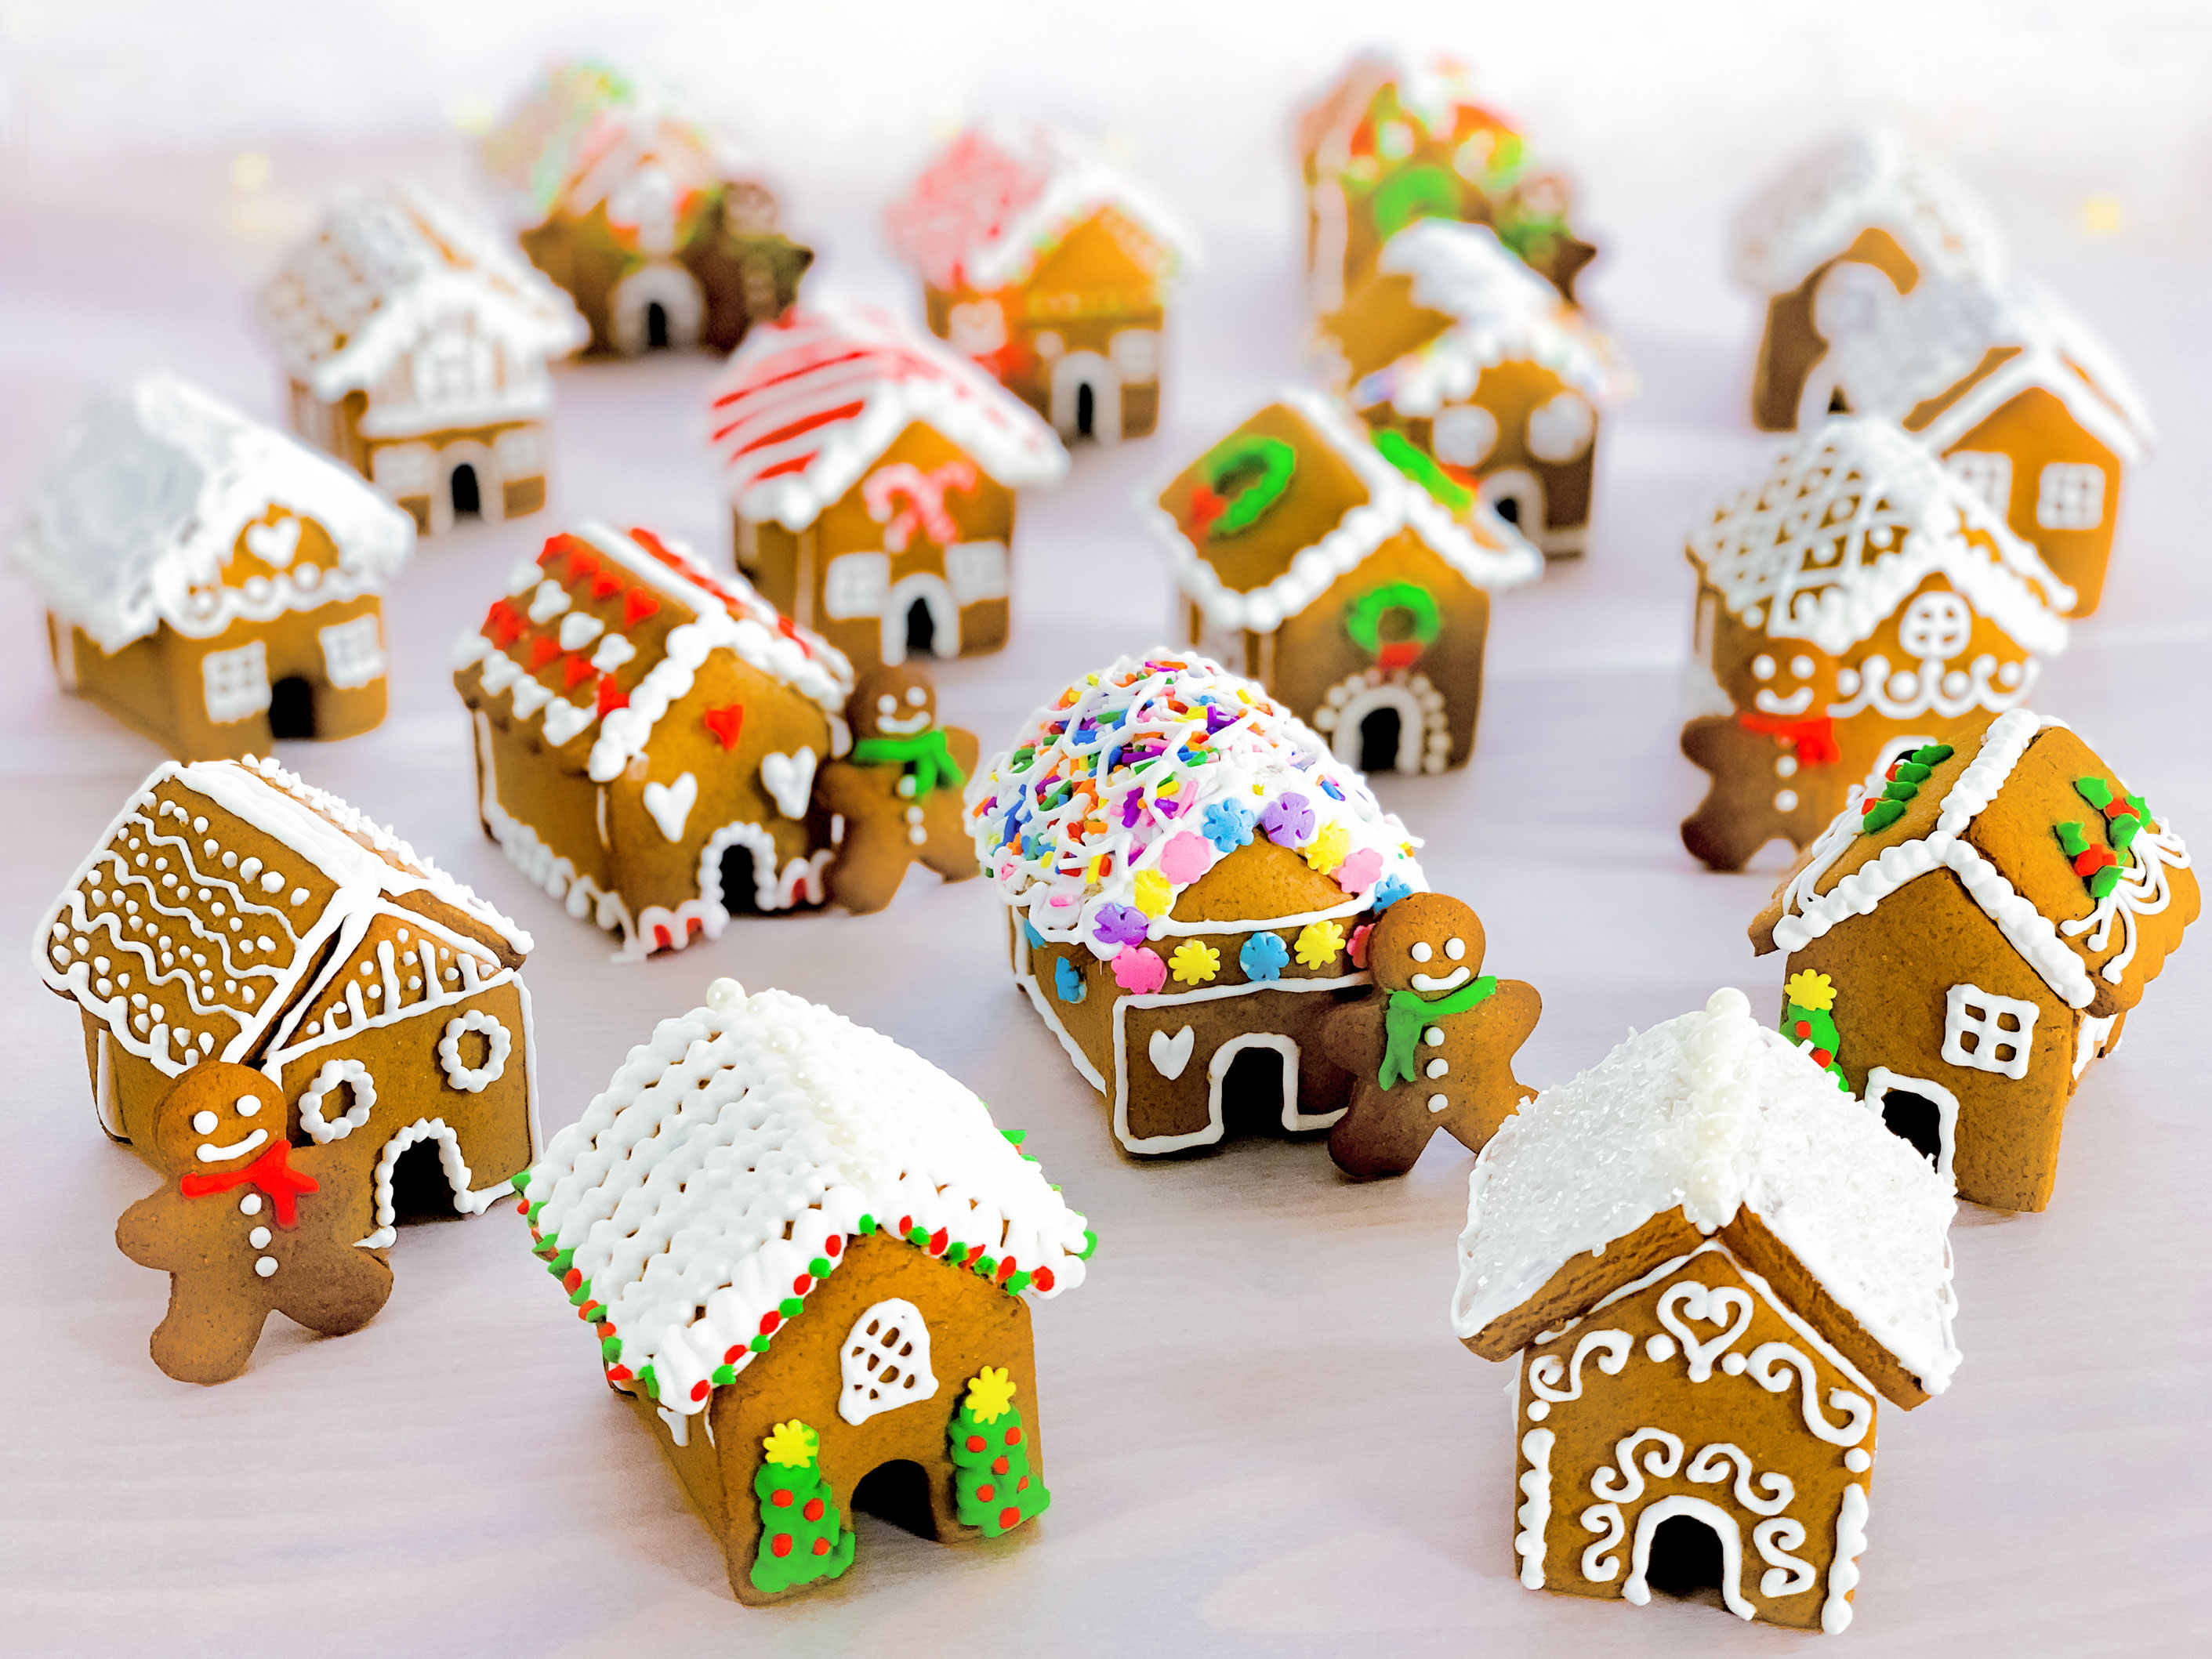
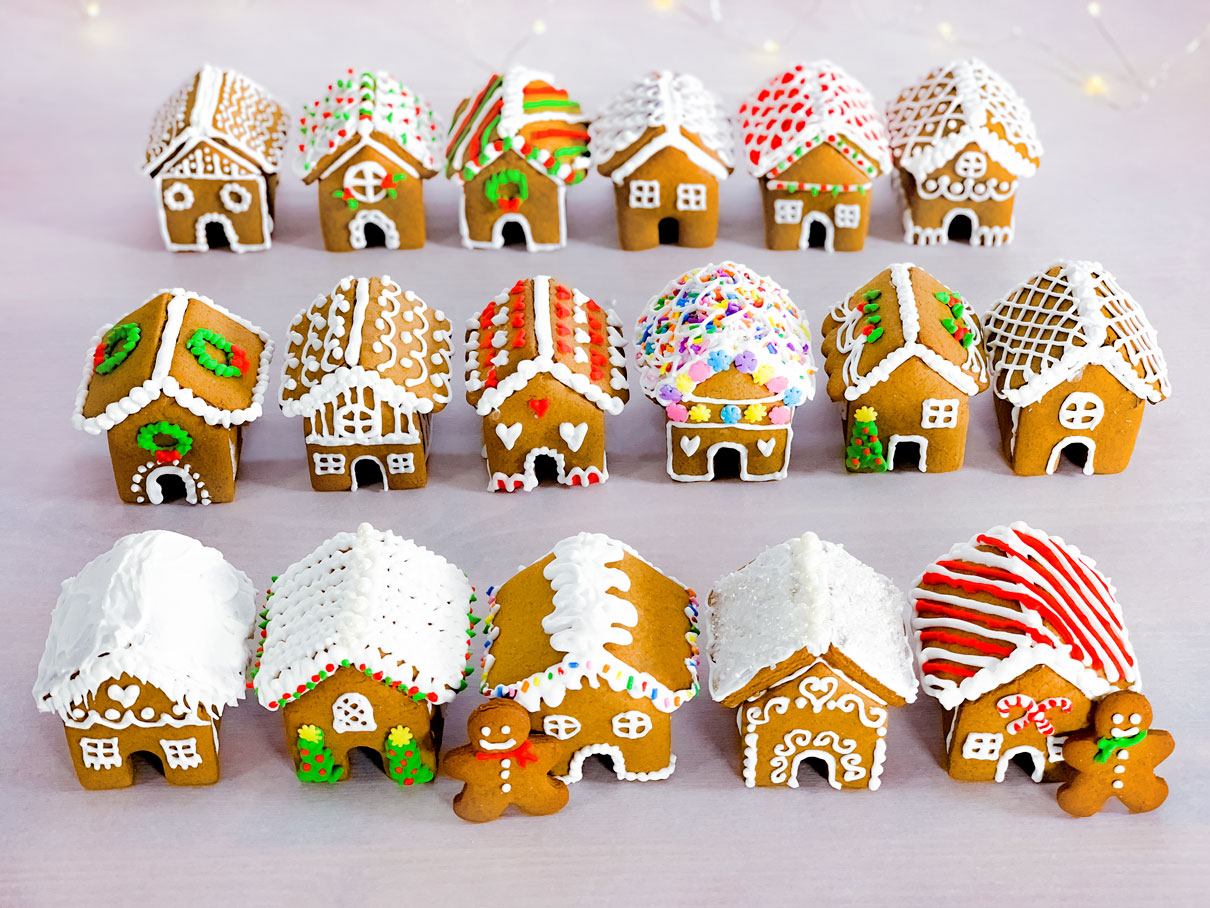
I’ve taken some close up photos of some of my favourite houses for your viewing pleasure. In total I spent about 6 hours assembling and decorating all these houses. Was it worth it? I think so! Would I do it again? Maaaaybe not for a while…but some day, yes.

Have a look through the photos below and let me know which little gingerbread house you like the best! Cheers to the start of the holiday season, and most importantly, cheers to the start of holiday BAKING!


Mini Gingerbread Houses
Ingredients
For the Cookie Dough
- 2/3 cup unsalted butter
- 3/4 cup brown sugar
- 2/3 cup molasses
- 1 large egg
- 1 tsp vanilla
- 3 1/2 cups all purpose flour
- 1 tsp baking soda
- 1/2 tsp salt
- 1 tbsp ground ginger
- 1 tbsp cinnamon
- 1/2 tsp allspice
- 1/2 tsp ground cloves
For the Royal Icing
- 1 1/2 tbsp meringue powder
- 2 cups sifted icing sugar
- 1/4 cup water
- 1/2 tsp vanilla extract
- 1/2 tsp almond extract
- Your choice of food colouring
Instructions
- Beat the butter in the bowl of a stand mixer on medium speed until smooth and creamy (about 1 minute).
- Add the brown sugar and molasses. Beat on medium high speed until well combined.
- Add the egg and vanilla and beat on high speed for 2 minutes. Be sure to scrape the sides of the bowl to ensure all the ingredients are well incorporated.
- In a separate large bowl, whisk together all the dry ingredients (flour, baking soda, salt, ginger, cinnamon, allspice and cloves).
- With the mixer on low speed, gradually add the dry ingredients to the wet, stirring until just combined.
- Divide the dough in half. Shape each half into a disc, wrap tightly in plastic wrap and chill in the fridge for at least 3 hours, or overnight.
- Pre-heat your oven to 350°F and line a couple of cookie trays with parchment paper.
- Take one disc of dough and roll it out onto a floured work surface until about 1/4" thick. You can sprinkle the dough surface with additional flour if it starts to get too sticky.
- Cut the dough into your desired shapes. For a gingerbread house you'll want four wall pieces and two roof panels. Re-roll any scraps and continue cutting shapes until the dough is all used up. Repeat with the second dough disc.
- Place the shapes onto your prepared cookie tray, about 1 inch apart. Bake for 9-10 minutes. Allow the cookies to cool for 5 minutes on the tray before transferring to a wire rack to cool completely.
For the Royal Icing
- In a large bowl, beat all the ingredients together at medium speed until the mixture forms peaks and starts to loose its sheen (7-10 minutes). If the frosting is too thick to pipe, add a little more water, 1/2 tablespoon at a time, until your desired consistency is reached. If the frosting is too runny, add a little more icing sugar. Colour the frosting with whatever food colours you would like. Transfer the frosting to piping bags and decorate to your heart's content!
They are magical!
Wow, you’ve already left the starting gate! Those are adorable, I can’t pick a favourite. Love, love this post.
Where can you get the cookie cutter from?
Hi Karen! I was given this cookie cutter as a gift from a friend, so I’m not sure where she got it from originally, but I found this link to the same one on amazon!
https://www.amazon.com/Sweet-Creations-Gingerbread-Cookie-Cutter/dp/B00NF73TR6/ref=sr_1_6?crid=3SKP4QG0G4W8V&keywords=3d%20mini%20gingerbread%20house%20cookie%20cutter&qid=1575257287&sprefix=3d%20mini%20gingerbre%2Caps%2C203&sr=8-6&fbclid=IwAR1a25QjwQDbb1wJbC5WIC6pLKvwwo5nXXMFVOsOvnA9MboYk3eMznD9CAE
It’s no longer a gingerbread house – it’s a santa cookie cutter.
Thanks for the heads up! I can’t seem to find an updated link for it. Perhaps they are not making them any more. If I come across a new link for one I will share it again!
Are the houses edible?
They are!