This article will show you several Daz3d Faster Render Tips. You will learn how to make your Daz Iray Rendering & Lighting faster inside Daz Studio.
If you prefer to watch, see our Youtube video below, otherwise keep reading.
When you have a big scene and you want to render – this can take up many hours. And this is not so uncommon or unusual. But what if you want to lower render times by a big margin? The tips from this article should allow you to reach that goal.
First of all, we need to make one thing clear – there is no such thing as “perfect settings” or even “good”. Simply because settings is the thing that is highly individual and subjective. This depends mainly on the scene and hardware. If you have a powerful computer you can allow a lot more for a lower rendering time and vice versa. So everything depends on what you are trying to render and on what machine.
As I don’t know your scene and your computer specifications – I can’t simply say “use this settings and everything will fly”. But I can give general tips and advice on how to render faster in iray daz3d that should work for everyone.

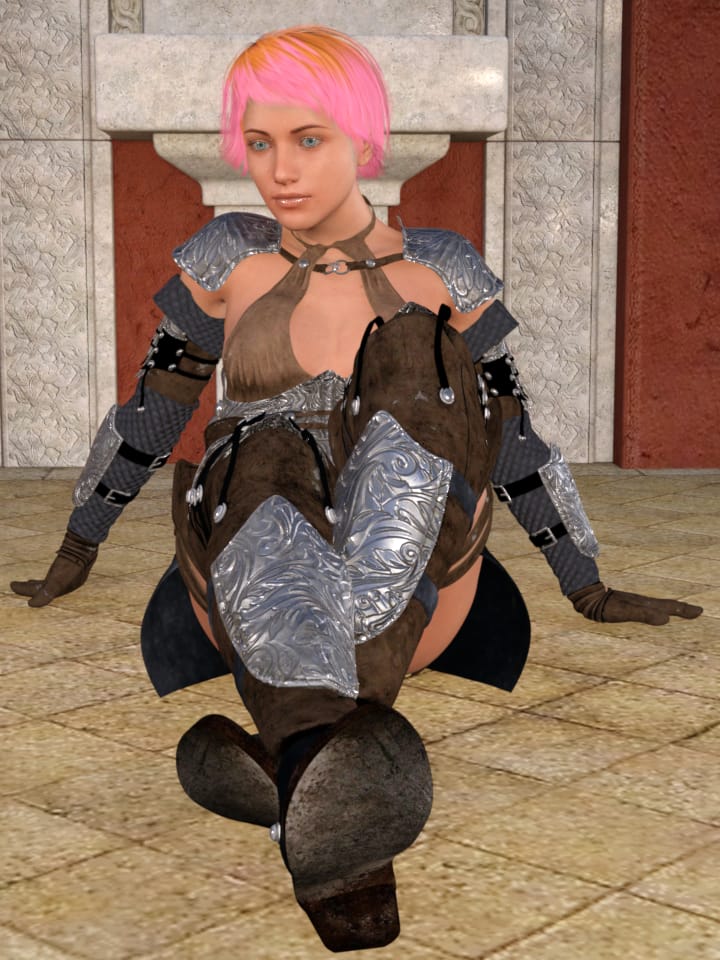
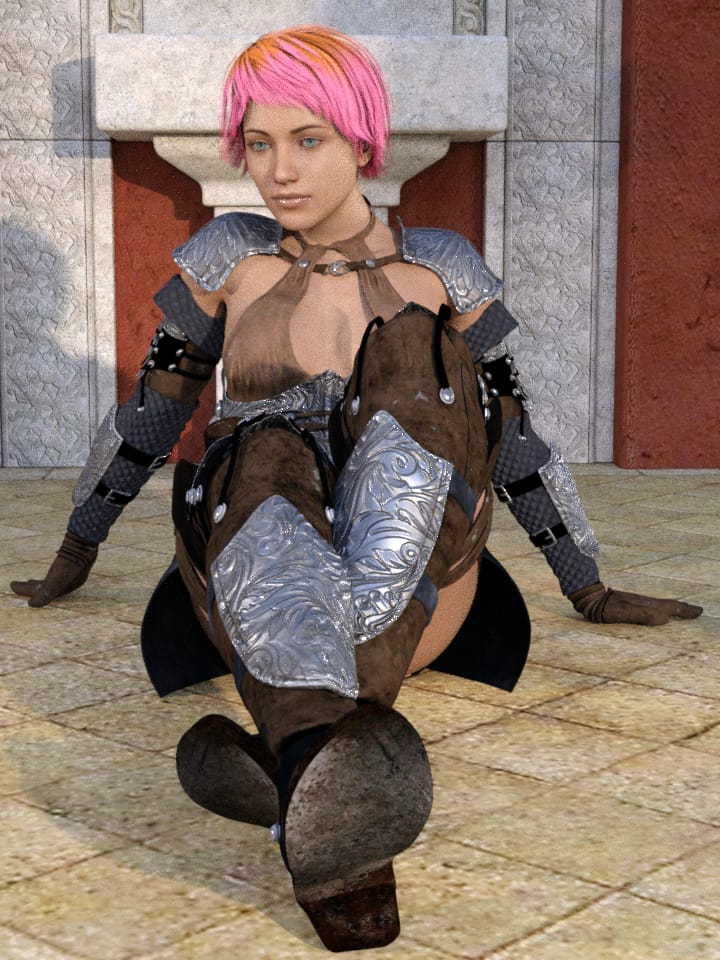
Source AJC College Times Outfit for Genesis 8 Female
Render Settings Daz3d Faster Render
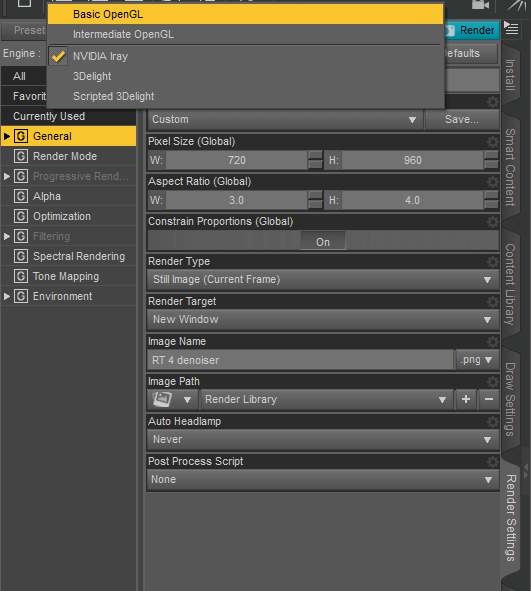
For the start let’s look at the “Render Settings” and what we can do there to speed up Daz3D rendering. This pane should be open by default and docked to the left side of the interface. If you can’t find it anywhere, then try to open it by going “Window > Panes(Tabs) > Render Settings”.
Reduce Pixel Size to Render Faster
This one of the more obvious Daz3D Faster Render Tips. In the “General” sections we are obviously interested in the Pixel Size. The more pixels you set there – longer would be the renders. But more pixels also means higher quality. So you simply need to decide for yourself what should be the balance here. I recommend sticking with 720p and 1080p resolutions, but it is up to you.
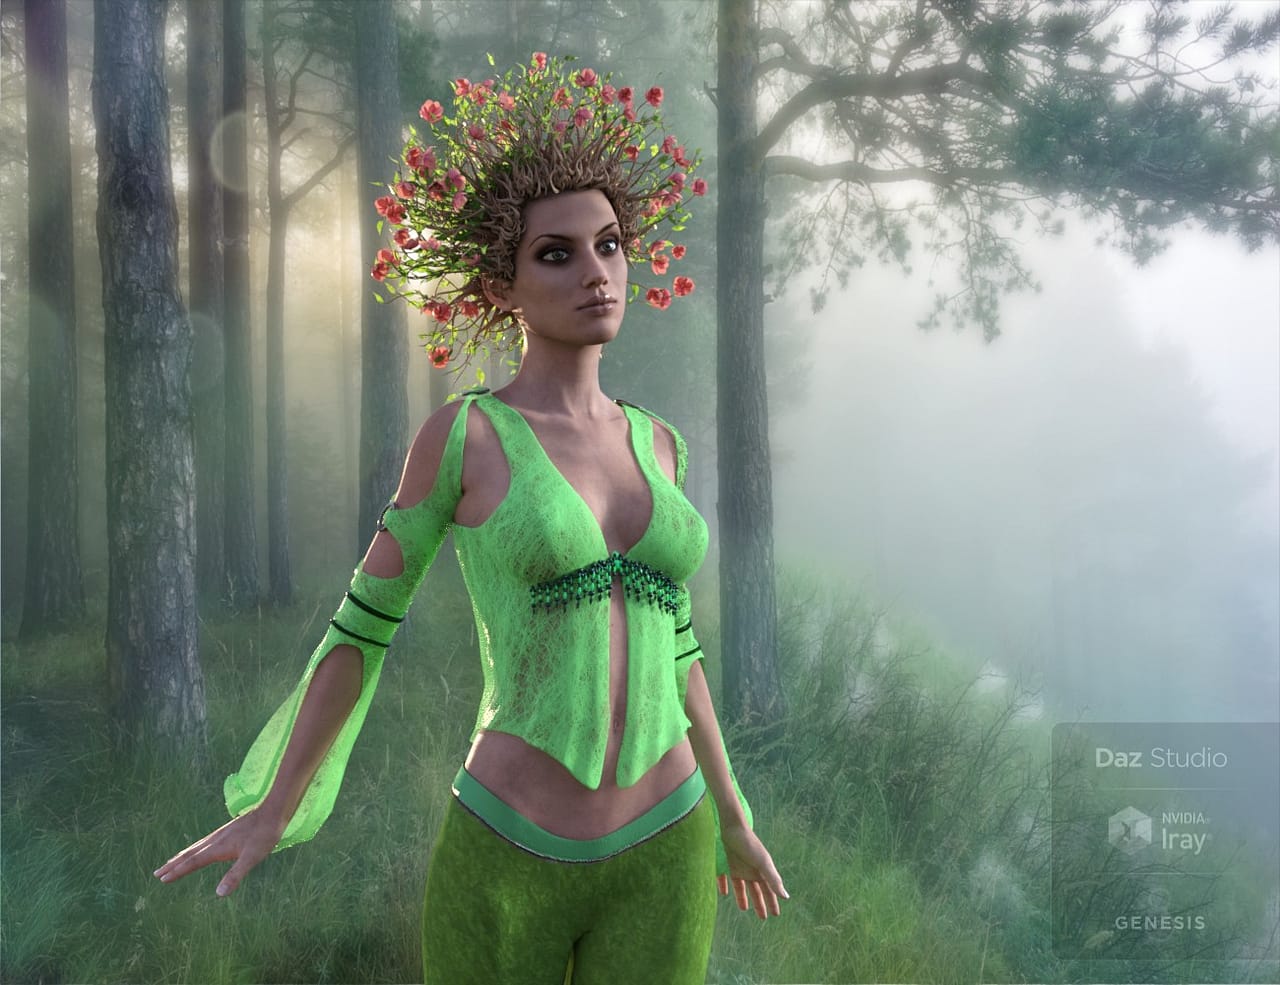
Source Garden Hair for Genesis 8 Female
Use Interactive Render Mode if it still looks good
“Render Mode” tab has only one setting. You can change the “Render Mode” from “Photoreal” to “Interactive”. Interactive will indeed improve your render times by a lot. But this totally changes how everything looks, not in a better way. You can experiment and try to use it in some scenes, but commonly people stick with the Photoreal option. Below you can see the comparison between the Photoreal and Interactive:

Photoreal Render Mode
Interactive Render Mode
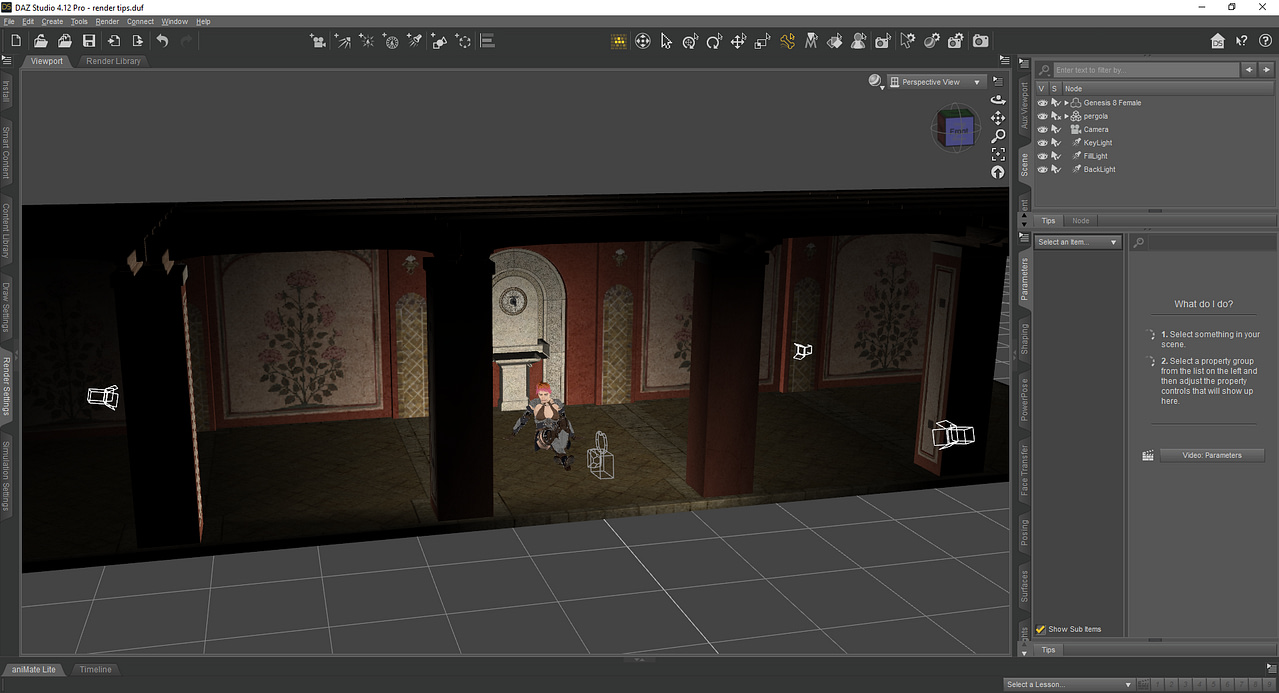
By the way I will use this scene for the whole article. It is a simple scene that uses HDRI as environmental lighting and a three point lighting setup. You can follow our How to Use Daz3d: Daz Beginner Tutorial to create a very similar scene or read Daz3d Iray Lighting Tutorial where we explain how to set up a good lighting yourself. Here is my scene setup:
We will look into the most important tabs in the next sections. The “Alpha”, “Spectral Rendering”, “Tone Mapping” and “Environment” tabs do, indeed, influence the render times. But they are a lot more about how your renders look in the end than about times. So there are no general tips here, as these settings may change drastically from scene to scene. You better read our Daz3d Render Settings: Basics & Tips article to understand them. It explains every tab of the Rendering Settings menu – what they do and how they affect your scene.
Tweak Progressive Rendering to Faster Render in Daz Studio
“Progressive Rendering” is, probably, the most important tab for you if you want to change your rendering times. As this is basically the main purpose of this tab to begin with.
Theoretically Iray render engine can render forever. So it needs some rules for knowing when the render is finished. Here you decide what these rules are.
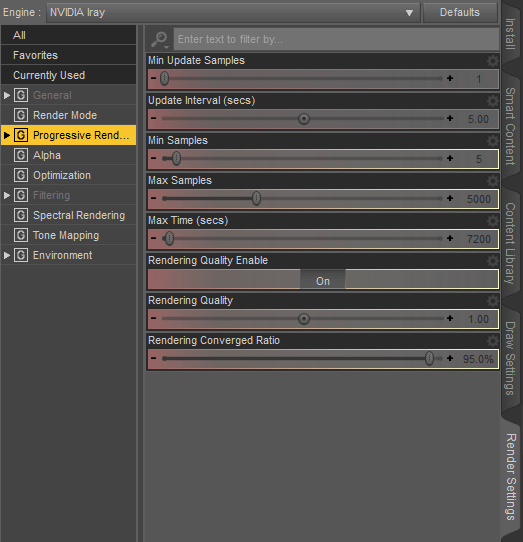
For example, you can set the maximum amount of time the render would take. So if you set it to 30 minutes – no matter what, the render will be done when it hits the 30 minutes mark.
The most used thing here is the “Max Samples”. Because the amount of samples defines how detailed and sharp everything will look. Low amounts of samples will lead to a grainy image.
Your goal with this setting is to find the perfect number for your case. You should start with a low number like a 100 and decie how this looks for you. If it is far from good, then bump the number up to 200-300 and repeat the process.The render can look good enough even at the 100-150 samples value. Or sometimes you will need to go up to thousands. Everything heavily depends on a scene, amount of props, their details and the lighting around them.
Rendering you saw in the previous section was done at the 250 max samples. Below you can see how the same scene looks at the 100 samples. A lot more grainy, some details are lost. Though it took less time to render.
Also in this setting there is the “Rendering Quality” option. Iray will try to decide how realistic the image is in percentages. So you can set here the number that you would like. This is a bit of an uncommon setting. And suits more for big and long renders and does not really speed up the rendering times.
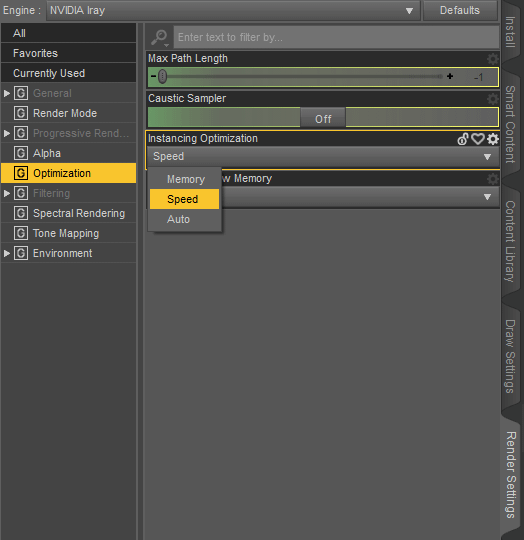
Tweak Optimizing and Filtering Tabs Settings to Increase Render Speed
The following settings can also yield some good Daz3d Faster Render Tips. An important tab is “Optimizing”. Sounds very promising, but in reality we are only interested here in “Instancing Optimizations”. You can set it to “Speed”, which in theory may improve rendering times. In practice, when I was testing it – the difference was so minor, you can say it is just within the margin of an error.
“Filtering” has more options. Firefly filter, to say directly, is a must. There is absolutely no point in turning it off(in my case turning it off saved a couple seconds). It takes a minimum time and improves renders by a lot by removing the white specks called “fireflies”. Here is the screenshot with its turned off, notice the specks on the skin:

“Post Denoiser Filter” did not extend my render times by that much, same as Firefly filter. But the picture with more samples without a Denoiser looks better and overall more sharp that the picture with lower amount of samples and Denoised image. So you can compromise here by setting the “Start iterations” options to around 90-95% of the Max Samples number. This way you will denoise only at the end if there is still some grain left. And it will not take a lot of the time too.
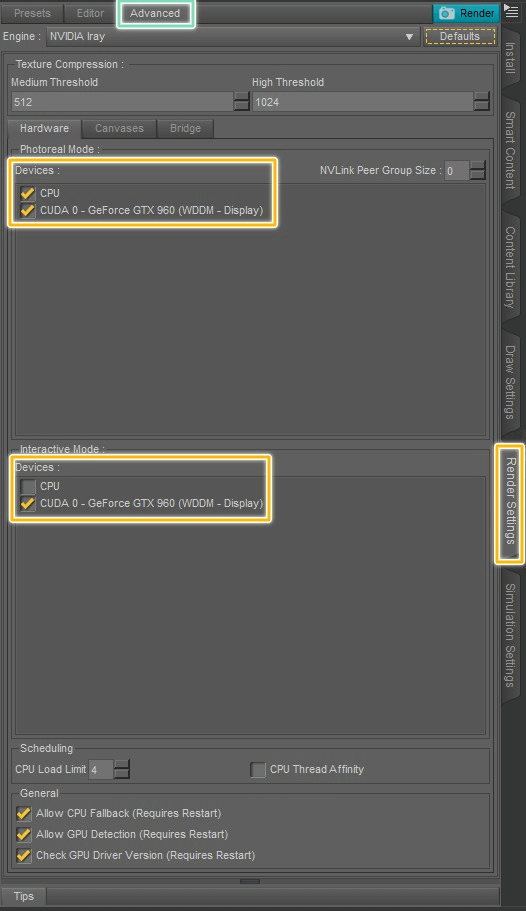
Use GPU for Daz3d Faster Renders
Advanced section. In the “Rendering Settings” menu there is an “Advanced” button. This will show you advanced settings. You always want to turn your GPU there, as they are significantly better for rendering than CPU. Also you can try to use both GPU and CPU at the same time, but in some cases it can make things worse.
Use the Default Iray Uber Shader
Iray Uber Shader. Iray works best with its own shader. This means if you have any other shaders on a scene – this can complicate renders and extend rendering times. To avoid it you can convert other shaders to the Default Iray Uber Shader.
Use Smaller Texture Sizes
Obvious thing, but sometimes people just don’t think about this or forget. Keep your texture tiling to a minimum, especially when textures are low resolutions from the beginning.
Use Depth Of Field – Daz Faster Render Tips
DOF will blur the background. And this means that it will not be rendered as precise, leading to lower rendering times. Besides, Depth of Field usually looks good and improves the overall image. Read Daz3d Depth of Field: How to Use it to learn how to use this tool properly.
Remove Objects out of the Camera Range
Another Daz3d faster render tip. If you have any objects that are out of your camera view and are not necessary for your renders – just delete them. Even if they are not being rendered – they influence your scene and extend rendering times.
Hide Objects out of the Camera Range during Rendering
Instead of deleting objects that are outside of the camera you can also use Iray Stand Kit. It hides during rendering objects that are outside of a predefined cube, speeding up the render process.
Render faster, render only objects inside a specific Cube with Iray Stand Kit
Use Simpler Lighting as Daz3d Faster Render Tips
Yes, if you have a lot of spotlights each with its own task – this can look really good. But each source of light extends rendering times by a lot. Calculating lighting is what takes most of the time for the render. That is why try using as few lighting sources as you can afford. In an indoor scene you could e.g. remove all walls and use only an HDRI. You can read our Daz3d Iray Lighting Tutorial that can help you to understand lighting better. You can also make use of several lighting products such as Iray Ghost Light Kit 2 or Iray Ghost Light Kit 3 or use less computational expensive HDRI we covered in our Daz3d HDRI Tutorial.
Use the Scene Optimiser Product
This Daz3d faster render tip is about Scene Optimiser, a set of tools that provide you with the possibility to lower the required memory for your scene. This will enable faster renders and viewport manimulation. In some scenes proper optimizations can lead to a tremendous time saving
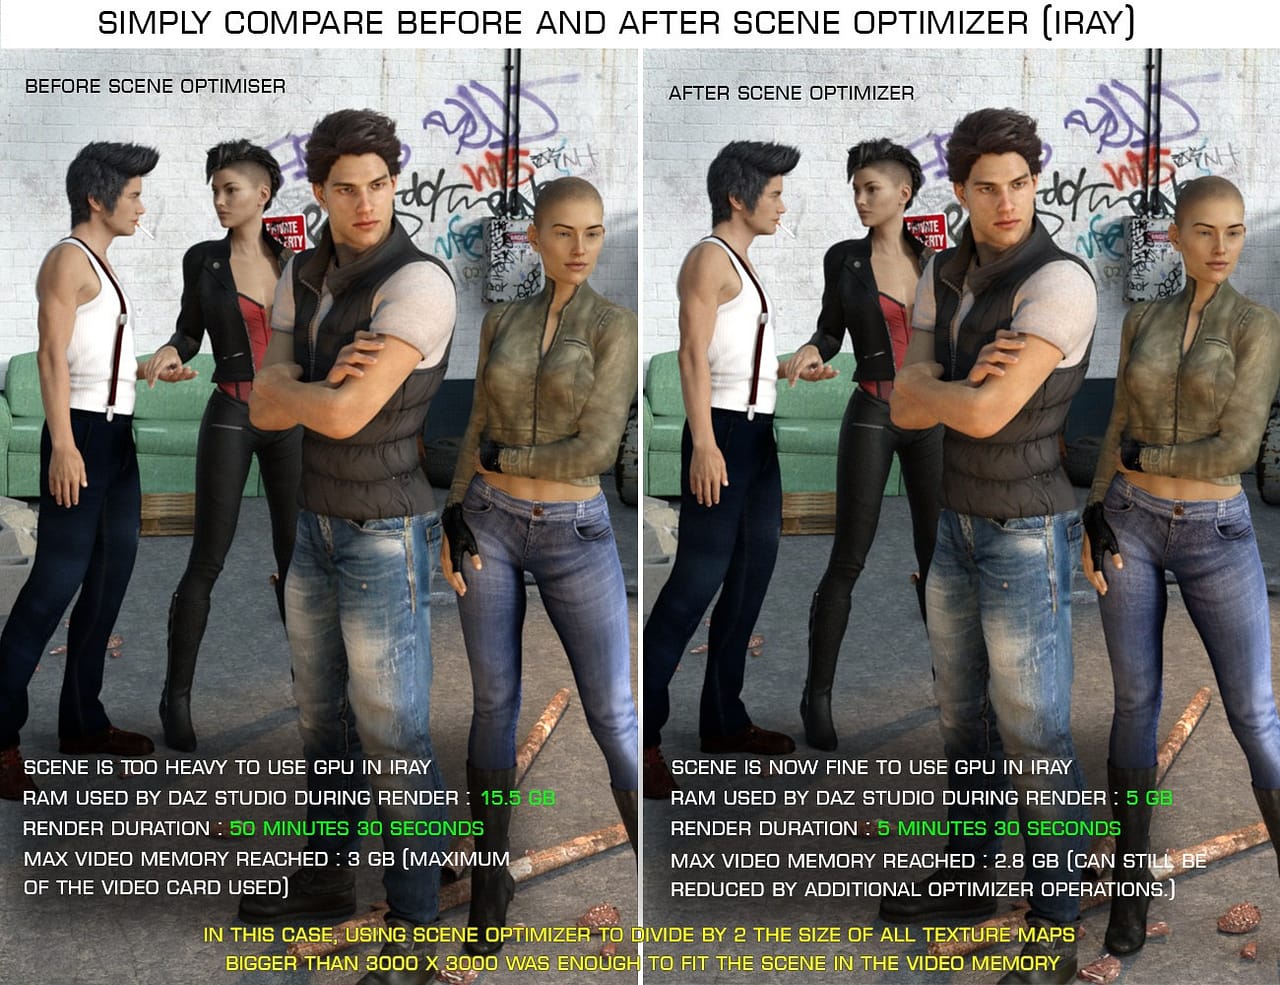
Example of Scene Optimiser in work
Move characters Further away from the Camera
Since then less details and skin needs to be rendered.
Use less complex Objects (Characters, Hair, etc.)
Try to use less complex characters and objects in your scene.
Oversampling – Daz3d Faster Render Tips
It is a way of making renders look better, but not increasing the “Max Samples” value that sometimes can be faster. Plan is to increase the resolution of the render by x1.5-2 times. And then squeezing it back to the original resolution. This will blend the samples together for a smoother final image and is another Daz3d faster render tip you can try out.
Animation Faster Render Tips
For rendering animations, first of all in the “General” section of the “Render Settings” menu change the “Render type” option from the “Still image” to the “Image Series” or “Movie”:
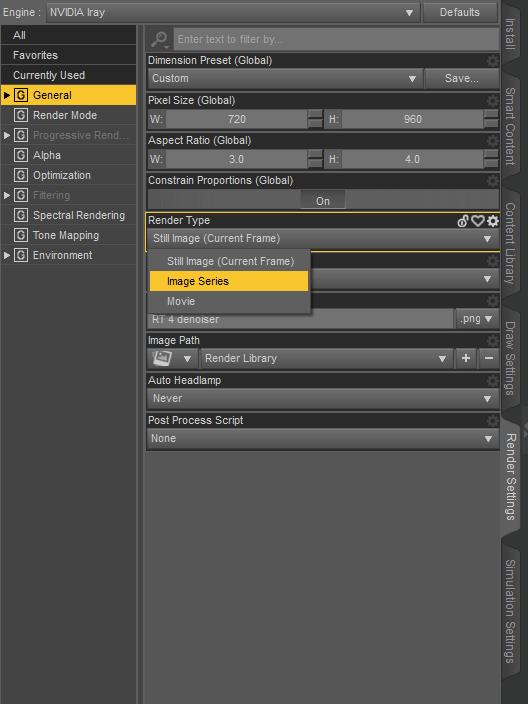
This way you will render animations and not just a current frame. It is better to choose “Image Series” here, as it has less problems and it is easier to work with it. Though “Movie” is fine too.
To make Iray render faster Daz3D animations you should just follow all the advice and the tips from previous sections. Specific tips for the animations are:
Always make test renders. Easy way to make a test animation is to change your render engine to an “Basic OpenGL”. This engine renders things exactly the same way as viewport. So it is really fast and you can check how your motion is looking.
You can afford to lower your settings. As animations are a motion, this means that each frame will be on the screen for a fraction of the second. In other words, there is no need for each frame to look perfect. Feel free to lower Max Samples or even an overall resolution.
Filament – Daz3d Faster Render Tips Also for Animations
Did you hear about Filament? If not, you should definitely check out our dedicated articles Daz3D Filament Tutorial & Daz3D Filament Animation Tutorial.
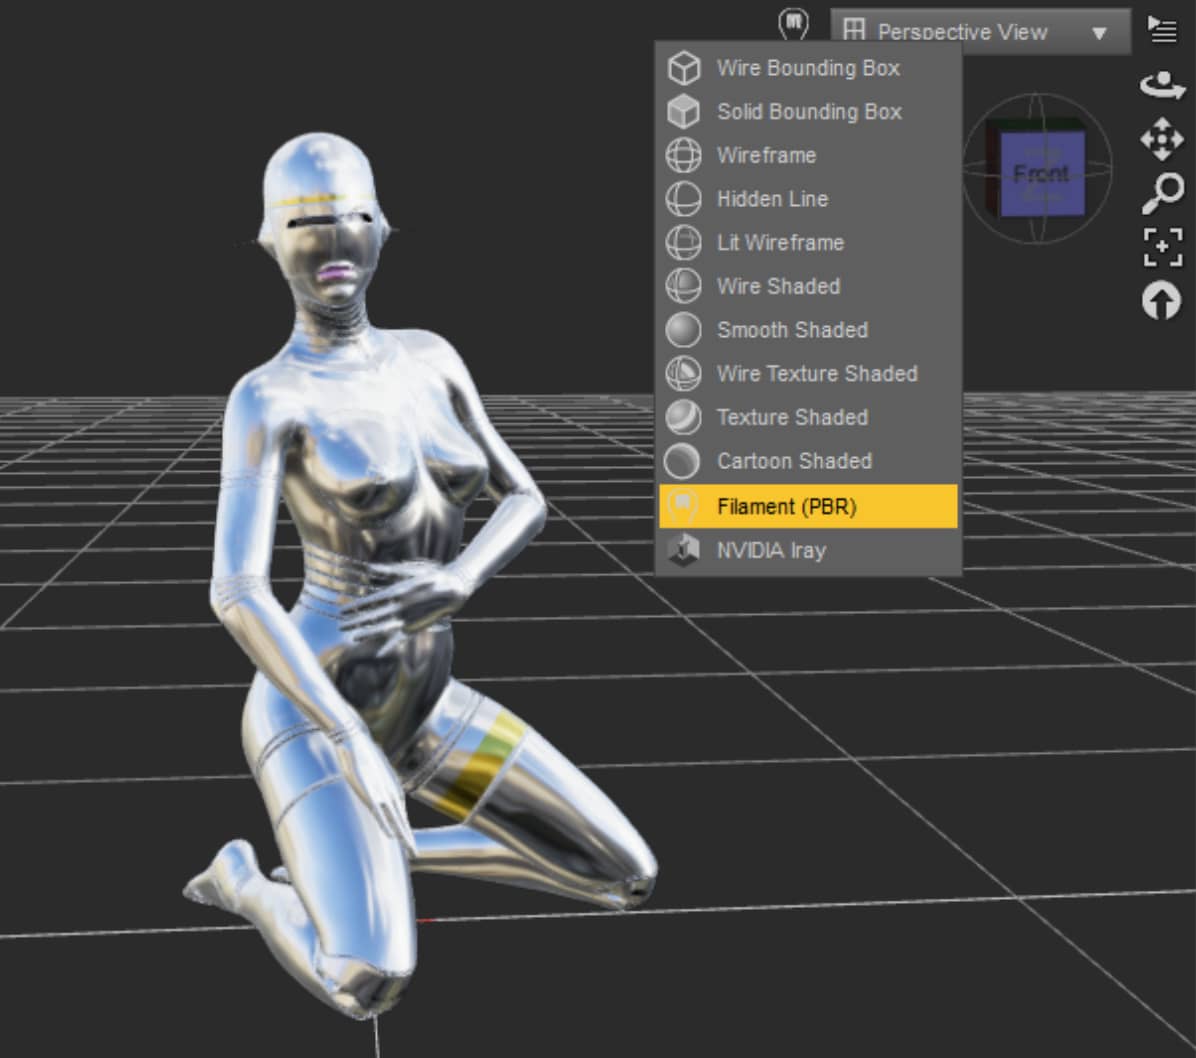
Filament is a great choice for previsualization when lighting is not a priority. It helps us have a quick look to understand and imagine what the final render will look like without compromising too much of our memory. It is, needless to say, ideal for big environment props.
As Filament continues to develop, we expect to see major improvements in terms of texture preview. So far there have been some issues regarding not properly reflecting light, casting shadows and displaying accurate materials like the hair one which causes lower quality render compared to iRay but with faster speed.
Viewport Optimization
In this section, we will focus on how to improve the performance within the workspace rather than the rendering.
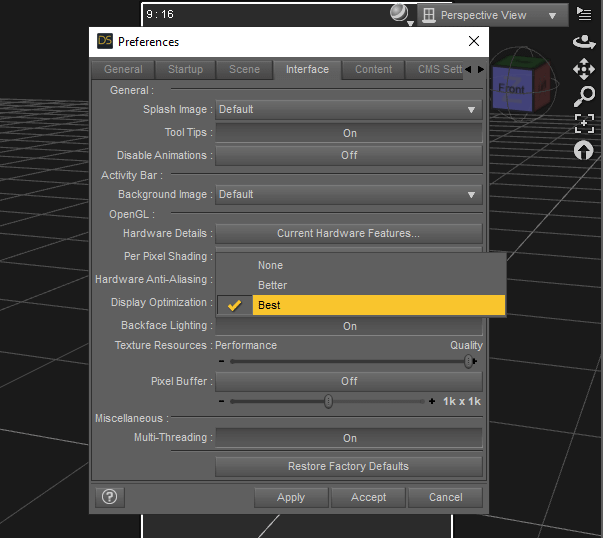
Tweak the Display Optimization
Here is a good way to speed up the render preview from the viewport:
Go to Edit > Preference > Interface and where it says Display Optimization, switch to either Better or Best. That way you will be able to perceive an improvement when moving around in a scene from the viewport preview. Hopefully you will avoid any type of lagging across many DrawStyle options.
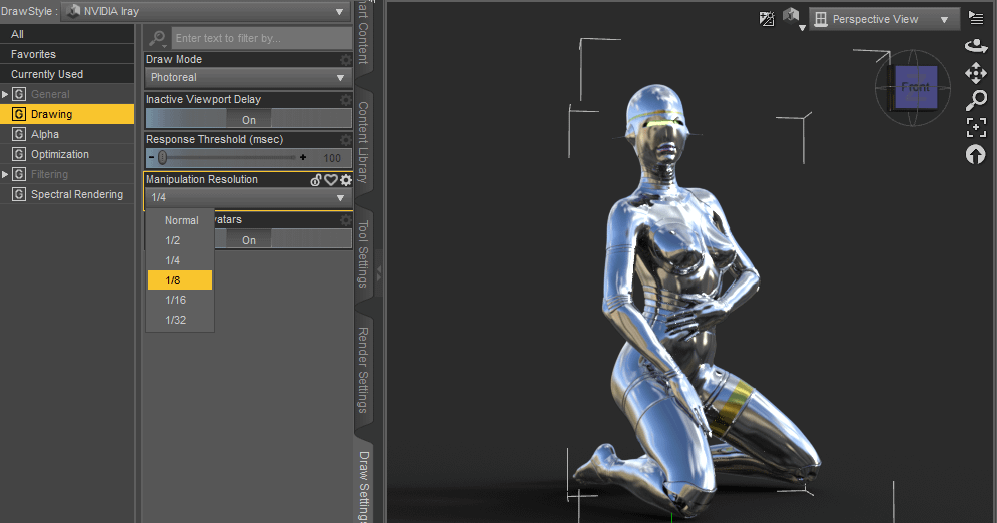
Check the Draw Settings
Another good tip you should definitely use. First go to the Draw Settings. If it does not show as an attached pane, go to Window > Panes > select Draw Settings.
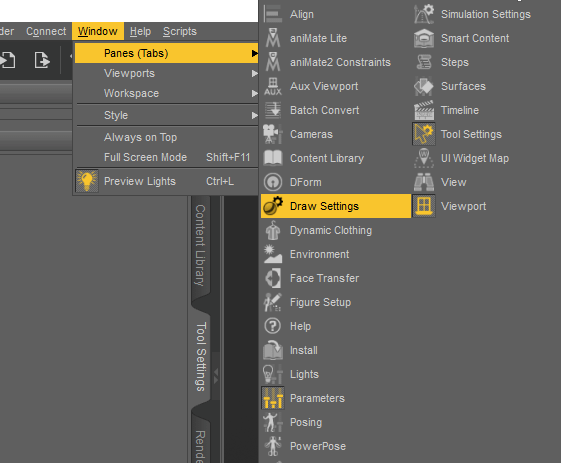
Make sure the DrawStyle is set to Iray. From the menu, go to Drawing and you will see a set of parameters.
Manipulation Resolution sets the resolution for the render preview when it’s moving. If it is set to Normal, the preview will display as it moves with maximum resolution. If we pick a fraction value, then we will split that resolution in 1/4, 1/8, 1/16 or 1/32 respectively. This action can have a good impact on performance and response speed. On the other hand, if we pick a low value there will be some pixelation.
Response Threshold has given me great results too. You should try setting a value and see how the render preview reacts. In my case, for higher values the iray preview behaved better, so when I moved around my model and made a sudden stop, the iray engine continued showing, also avoiding a pause to recalculate.
Cleanup Daz Content Library Installs
As we make purchases and download content to this folder, it sometimes has an awful impact on the software performance – especially you can notice this when having installed many morph products.
If you have content that you do not normally use, try saving everything in an alternative location or removing it temporarly. In such a way, when Daz opens, or when opening a character, it runs with the minimum extra.
Conclusion Daz3d Faster Render Tips
This article tried to explain one of the most common questions with several Daz3d faster render tips. There are many ways, most notable of which was mentioned here.
In conclusion I want to remind you that there is no such thing as perfect settings. We can only give you general tips and advice. You will need to try things out and experiment, after some time you would be able to understand how things work for yourself. See also our other Daz Tutorials and Top 3D Model Reviews.