 I thought it was time to talk about my filter, since I’ve talked a bit about issues I’ve had with it.
I didn’t tank any pictures of the process of installing this. If I do it again, I’ll be sure to get some. This was all before I decided to start blogging. If you want to see a similar installation, Pecktek put in a similar filter. His came from Swiss Tropicals, which I totally would have done too, had I known about them at the time. If I do this again, I’ll be hitting up Swiss Tropicals, this build wasn’t time consuming, but kind of a pain in the ass.
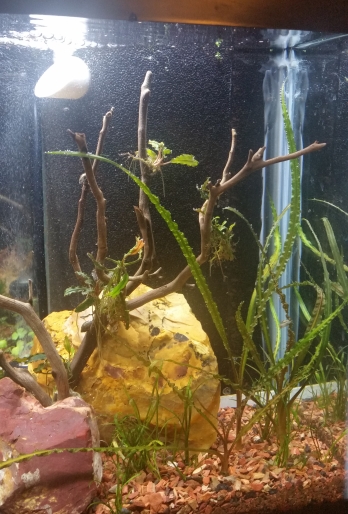
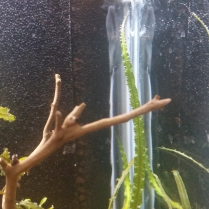
Hamburg Matten filters or HMFs are incredibly old school style filters that have been around since the 1960s. They are thought to originate in Hamburg, Germany, this is why the big name for what is essentially a very simple filter. The entire filter consists of a piece of foam that fits snugly at the end of your tank and an air lift which is basically a piece of PVC pipe. The foam is usually between 2-2.5 inches thick usually, although I’ve seen some that are around 1 inch with a plastic frame. The PVC has an elbow that runs through a hole near the top of the filter and down the back. The whole filter is propelled by a simple air pump that is fished through the pipe and attached to an air stone inside. The bubbles cause lift that pulls water from the bottom of the pipe and pushes it out the opening on the other side of the foam into the tank. This create suction that pulls water through the foam which is full of nitrifiying bacteria.
While almost primitive in its design, it really is amazingly effective and almost no maintenance. The entire piece of sponge needs cleaning maybe once every 1-2 years. I’ve heard of people not cleaning these filters for much longer. Basically when it’s time to clean you pull it out, and rinse it in tank water, then pop it back in. In other words it is a giant sponge filter.
I got this filter because I wanted low flow and something I didn’t have to worry about tiny shrimp getting sucked up in. I picked mine up from Flip Aquatics for $17. I was planning on DIYing this, but I couldn’t find the foam I wanted. I decided to just get it from a store that specializes in shrimp to make sure I got foam that wasn’t too porous. Don’t want the little babies to get stuck in it and die.
Originally I planned on putting it across the end, but it takes up a lot of space. the sponge is 2 inches and I needed another 1-2 inches for the air lift (PVC pipe). That would have turned my 30 inch tank into a 26 inch tank. Maybe not.
So I turned it into a corner filter. I cut off an inch of foam on both sides so it didn’t stick out too much into the tank. I used a sharp steak knife and a large square. If I pull it out, which I really don’t want to, and well get to that in a minute, it looks pretty sad along the edge. Then picked up a piece of glass and glass cutters from Home Depot. I measured the glass so I could get a piece that was the right height. I got an 11 by 14 piece of glass. We cut two one inch strips off the glass. Actually, we cut about four strips, but only two were usable. Be sure to pick up some sand paper, unless you want to slice your hand open every time you touch it. sand down the cut edges and it will make it much more manageable.
We, mostly my husband, siliconed it in five inches from the corner on either side. We cut a paper towel roll to help us make sure we got it exactly five inches all the way down the glass piece. I highly recommend using some sort of template to do this. I made a mess adding a bead of silicone around the glass piece to help make a solid seal. I added way too much, but whatever. We waited the obligatory 24 hours for it to cure then popped the filter in and add water.
Okay, so beyond being a great filter, I can hid all kinds of stuff behind it. Like the heater, and some filter material to cycle the tank. It also makes filling up the tank really easy. I have Seachem Fluorite. This is notorious for clouding the water. I just hook the python behind the filter and let it rip. The water dissipates through the sponge and doesn’t disturb the substrate. I have noticed the debris in the filter gets blown back into the tank. So far, it’s been okay, but I might have to change my water changing activities and mulm builds up.
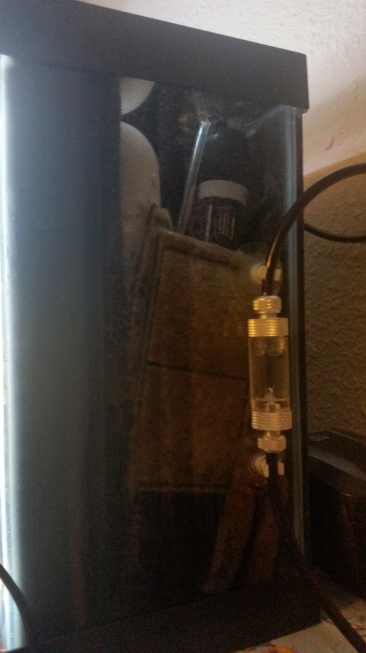
Since it has only been up and running for a few months I haven’t needed to pull it out for cleaning. We did add a piece of corrugated plastic between the bottom of the filter and the substrate. Hopefully that will make it easier to pull out and put in without a ton of substrate falling behind. I’ll let you know when I do. There are really only two down sides I can see with this type of filter. The first is that it doesn’t provide a lot of flow to dissipate the CO2 around, I was able to fix that by moving my diffuser to the front of the filter. I also don’t want too much flow because of the shrimp and nano fishes.
The other is the footprint in the tank. It does take up a lot more space than a HOB. For something that I don’t have to fuss with for a year, and won’t burn out if I forget to unplug during a large water change, I’ll take the good with the bad.
This type of filter really will work for most tanks. I’ve seen them in axolotl tanks, shrimp tanks and fish tanks. Anywhere you want good filtering, low flow and don’t mind giving up some space you can use this filter.
