

Introduction: Semi-Automatic Rubber Band Gun


This Instructable uses a laser to cut out a simple pattern for a rubber band gun made from 1/8 inch Baltic Birch Plywood.
The instructions are in two parts.
The first part will provide instructions to cut panels and assemble additional bits to make a complete rubber band gun kit to give as a gift or to sell. The kit consists of 5 panels with the necessary working bits included.
The second part of the instructions takes the panels apart and assembles the pieces into a 5 shot semi-automatic rubber band gun with five targets.
If you make the kit, you may want to print the second part of the instructions and include them with any kit you supply.
I make these at the Chandler, Arizona Techshop (TSChandler8861), on a Universal Laser.


Step 1: Bill of Materials to Build the Kit

What you will need to build the kit:
Links
- 1/8 inch Baltic Birch Plywood (Optional 1/4 inch Baltic Birch Plywood for the center piece)
- Spring Loaded Windshield Shade
- Round Toothpicks
- Rubber Bands
- Packing Tape
- Sand Paper
- Wood Glue
Step 2: Cut the Panels

Use a Laser with sufficient power to cut through 1/8 inch Baltic birch plywood.
Each individual panel is 4 inches by 6.25 inches. There are five panels in the kit (three without the cover or targets)
Note: The center piece panel can be cut from 1/4 Baltic birch. This makes the gun thicker but does not effect operation.
Step 3: Cut and Shape the Trigger Return Spring


Strip out the spring from the windshield shade
Cut off as many 2 inch pieces as needed.Each kit needs one.
Make sure the spring width is smaller than the thickness of the plywood used to make the center piece. If the spring is too wide, make the center piece out of thicker wood (like 1/4 inch Baltic birch)
Note: I tried using MDF. The laser charred the edges and left charcoal everywhere I touched. Its messy.
Bend the springs as shown in the illustrations
Special Note: These are very slight bends, but sufficient to hold the spring in place by tension.
Step 4: Cut the Sandpaper and Glue to the Panel

Place the sandpaper face down on the laser when cutting.
There is a pattern for cutting the sand paper in the file
After cutting the sand paper, glue it to the rectangular block piece cut out of the side piece panels.
Step 5: Add Tape to the Center Piece


Cover the center piece with tape.
Note: The first few I made, I used regular cellophane tape. It worked just fine but did not show up well in the pictures. So, I found tan packing tape.
Cut away everything that is not a part of the center piece.
Do not cover the trigger.
This makes the center piece a fraction wider than the trigger piece making it possible for the trigger piece to slide between the outside panels when the whole assembly is put together.
Covering one side might work. I cover both sides.
Precision is not necessary here. You need just enough tape to keep the side panels away from the trigger.
DO NOT COVER THE TRIGGER
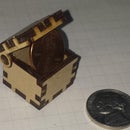
Step 6: Now You Have Everything You Need for a Kit


With the following steps completed, you have everything needed to assemble a Rubber band gun kit of parts.
- Metal spring is installed in the center piece.
- Center piece is taped.
- Sand paper is glued to the block and installed in one of the side piece panels
Set aside 10 rubber bands and 5 toothpicks
Stack the pieces so the holes in the lower left hand corner align.
Note: This means that one of the side panels will be up-side down.
- Targets on the bottom (with bull's eye facing up)
- Then: Side piece panel with the sanding block
- Then: Side piece panel with hole (upside down / no sanding block)
- At this point add the toothpicks inside the large hole and rubber bands inside the trigger guard hole
- Then: Center piece panel
- Then: Cover panel
- Wrap the whole thing with a rubber band.
That is the rubber band gun kit.
Step 7: Materials You Will Need to Build the Rubber Band Gun

Using the following materials and tool will make assembly and use easier.
- The wax makes it possible for the trigger to slide inside of the rubber band gun
- The CA gel glue holds the toothpicks in place after they have been broken off
- The cutting blade is used to score the toothpicks at the surface so they break off cleanly.
LINKS
Step 8: Build the Rubber Band Gun

Push out the pieces
Take an inventory.
Look at the picture: These are the pieces that the kit should have included.
Step 9: Add Wax to the Trigger


Wax the portions of the trigger where it will rub against the center piece and the side pieces.
Install the trigger into the center piece with the spring in the slot.
Note: The center piece in this picture had clear cellophane tape installed as a spacer.
Step 10: Sand the Back of the Side Pieces

Sand a bevel into the serration at the back of each side piece.
DO NOT SAND THE CENTER PIECE SERRATION
The bevel on the side pieces should go from the outside to the inside edge as shown in the picture.
If the rubber bands catch/bind at the serration then it needs additional sanding.
DO NOT SAND THE SERRATIONS OFF
Trick: Add a little wax to the sanded surface on the serrations
Step 11: Assemble the Pieces


Put the side pieces on and add the grips.
Note: Wash the wax off your hands/fingers before the next step. Glue might not stick to a toothpick coated with wax.
Push the toothpicks through the holes (toothpicks should be a slight press fit) and press the panels together.
With everything squeezed together, the trigger should slide back when pulled and then the spring should cause the trigger to return.
If not, disassemble and find out whats wrong
Step 12: Break Off the Toothpicks, Glue and Sand the Ends.


Use the sharp blade to score the toothpicks at the surface of the outside panels and grips. This makes it easy to break the toothpick off flush with the surface.
Do this for all four toothpicks on either side.
Seal the broken toothpicks with CA gel glue
Sand after the glue has dried.
Step 13: Load With Rubber Bands

Load the rubber band gun with rubber bands
Stretch the rubber bands from the muzzle to the back and bottom to top to prevent the rubber bands from binding.
I have double loaded each space and successfully released all five shots, but sometimes one of the rubber bands will stick.
Step 14: Assemble the Targets

Build the targets and set them up.
I put them inside an open box to catch the rubber bands.
Optimum range is about 24 inches.
5 shots - 5 targets
Try to get five for five. Even at 24 inches, Its harder than it looks.

Participated in the
Makerspace Contest


