My dad and I decided to make a scratch built vivarium to help me learn about how drainage layers and ventilation works when designing a habitat for small rainforest animals. We had some extra glass laying around and a 3D printer that was idle, so we decided to make the vivarium from scratch.
Construction video by Shannon
I made this video summarizing the process that I presented to my 7th grade Science class:
Detailed instructions (by Dad)
We used materials we had on-hand to construct these mini-vivariums:
- 3 sheets of 16″ x 20″ glass (~$6 a sheet)
- tube of silicone (~$4 – fractional usage)
- can of great stuff (~$4 – fractional usage)
- assorted plants (~$25)
I provided the approximate prices for a frame of reference. We always have silicone and hardscaping materials at the house, and we happened to have three sheets of glass on hand for our first vivarium build (we ended up building three!).
Contents:
Glasswork
Here’s an example of the glass we used from Home Depot:

Since these were 16×20 sheets, we cut them in half to form two 16×10 sheets to make up the sides. The total glass pieces were:
- sheet 1:
- 2 x 10″x16″ sheets (left and right side)
- sheet 2:
- 1 x 9.75″x10″ (door)
- 1 x 9.75″x4″ (front panel)
- 1 x 9.75″x13″ (rear upper panel)
- 1 x 9.75″x2″ (rear lower panel)
- sheet 3:
- 1 x 10″x10″ (base panel)
- 1 x 10″x6″ (top panel)
- 1 x 10″x9.75″ (false bottom panel)
- scrap cuttings for false bottom supports
We didn’t take pictures of the cutting process – cuts are cuts. We did wet sand the external edges to prevent slicing up our hands after we assembled the viv.
false bottom
A big part of our focus was on the false bottom design. When I use commercially built vivariums I tend to rely heavily on egg crate diffuser light panels for creating a false bottom. I this case we wanted to use a sloped glass design similar to a euro-viv. The glass base is sloped down with the back being the high point (3 inches) and the front being the low point (2 inches). There is a gap in the front of the viv that is covered by a stainless steel screen that completely seals off the vivarium floor from the false bottom.
Here is the firs step, where we marked the pitch we wanted for the false bottom:

First a water test before we glue in the false bottom:

While we were waiting on the water test we glued small squares of scrap glass together:

We then glued the doubled up pieces of scrap glass on the sloped line to serve as a shelf that we could set a glass plate on:

Once the braces dried we inserted the glass base and fitted the stainless steel screen:

The false bottom is wet in this photo because we tested out the drain rate and it was great, handling a flow of 32 ounces of water in a few seconds.
3D printing
We worked up door and vent designs in tinkercad. This is the model for the top screen vent and upper door frame:

This is the lower door assembly that includes the door frame, a pull, and vents:

Finally this is the rear false bottom access panel covers:

I decided to try a different approach with false bottom access with these smaller vivs. Normally I drill a bulkhead for draining the false bottom in a commercially available viv. But since I was building these, I decided to leave a one inch gap in the rear glass pane that would be below the false bottom which allows access to the bottom of the viv. This allows me to tip the viv to drain it whenever I want, or to run my RO hose in there to flush anything out. The doors allow me to keep the evaporation rate down. It’s an experiment, so we’ll see how it does long term.
Once the designs were done we went ahead and printed:

I do a lot of custom dart blaster design, and another hobbyist turned me on to using metal pins within my designs to join pieces together. I used this approach to join my frames together to help provide rigidity. Here’s the bag-o-pins I keep on hand:

And a few examples of the pins:

Here you can see how they are seated in slots printed into the model:

Providing a clean, sturdy joint between the two pieces:

This was a dry fit. I did use a plastic glue to weld the pieces together. Here you can see the plastic frame seated in the viv:

And a shot from above:

I left some margin for error in my glass cuts with this design:

You should not notice this rear slot, and because I have flexibility in the back of the frame, I can get a clean joint at the front:

The lower door assembly used a similar approach to join the lower vents:

Similarly pins were used in the rear false bottom access doors.
I also printed out protective plastic feet to ensure I didn’t ding the corner of the viv and shatter the glass when I was moving or maintaining the viv.
hardscape
We used Great Stuff for our first viv background and DAP Touch ‘n Foam Landscape Exterior Filler Adhesive for our second and third. The DAP product is black, which makes for an easier finish, but it expands more aggressively which can lead to problems :).
First vivarium – yellow foam


Second vivarium – DAP black foam
These next two builds focused on a more intricate network of caves and visual breaks that will provide an adequate setup for a pair or trio of micro-geckos. This sequence of images takes you through one of the designs so you can see the series of hides built into the hardscape. Here is the entire hardscape:

It’s hard to perceive the depth, but these foam crevices go several inches back in to the foam:


Third vivarium – DAP black foam…explosion
This one didn’t go as well. At first our hardscaping looked really good:

But then we rotated the viv around to work on the back false bottom access and BOOM – a foam explosion!


After several hours with eye protection, a few pair of pliers, and razor blades the glass shards were removed and the extra foam was shaved down. We added a replacement back pane of glass and we were good to go!


We don’t seem to have photos after the application of charcoal tinted drylok, but you can check out the planting section for the final look. Our goal was to give this a pumice or volcanic rock look to take advantage of the black foam.
substrate
We left a wide screened area at the front of the vivarium for false bottom drainage:
We used this area to concentrate a layer of horticultural charcoal to serve as an in-viv springtail culture. We built up a large layer of charcoal:


Once we had this charcoal section setup, we mixed up soil with equal parts of:
- milled peat moss
- long fiber sphagnum moss
- coco blocks
- horticultural charcoal
This mix has done well for us in the past for both plants and microfauna.

planting
We purchased a variety of micro-plants for another project from The Violet Barn. Since we had extra from that project we leveraged those plants here, along with a few cuttings from plants we cultivated in other vivariums. Our plant list:
- Pleopeltus percussa (creeping fern – used as epiphyte)
- Selaginella kr. aurea (spikemoss – used as epiphyte)
- cupreata (flame violet)
- trailing african violets (teeny bopper & assorted cuttings from other vivs)
Other than cupreata which is new to us, the other plants on this list have been great terrarium plants for us. We will see how it goes with cupreata, but it is already throwing nice red flowers.
Here is an image of a creeping african violet planted in the substrate:

We wrap the perimeter of the base of the plant with long fiber sphagnum moss to help with moisture retention. This has helped us reduce the shock of bare rooting and transplanting. Another african violet:

Once the plants are in the floor of the vivarium is covered in a thick layer of leaf litter. The leaves are carefully worked around the base of the plants for added moisture retention:

A wider angle shot of one of the vivariums showing the planting of the floor, the planting of the epiphytic ferns at the top of the viv, and how leaf litter is worked into the various cork tubes and shelves to provide added cover for the animals that will eventually inhabit the viviarum:

Note this vivarium is very wet following a spray down. Generally it is maintained at a lower moisture level without wet surfaces and water droplets. These images were taken immediately after a thorough misting following the planting of the vivarium.
An image of the front lower portion of the vivarium below the door vent showing the springtail charcoal layer now covered in leaf litter:

The third viv has Pleopeltus percussa planted at the top, two teeny bopper african violets planted in the back wall, and cupreata on the floor. Again note these photos were taken immediately after the first thorough misting, so the viv is much wetter than it will be during normal conditions:

It is difficult to get an idea of the depth of this little vivarium, but the cork tubes actually protrude all the way to the front glass. The design was created to provide UVB basking spots for any future animals, as well as an intricate series of hides and caves that should provide for ample micro-climates.
Assorted shots of the final scaping:


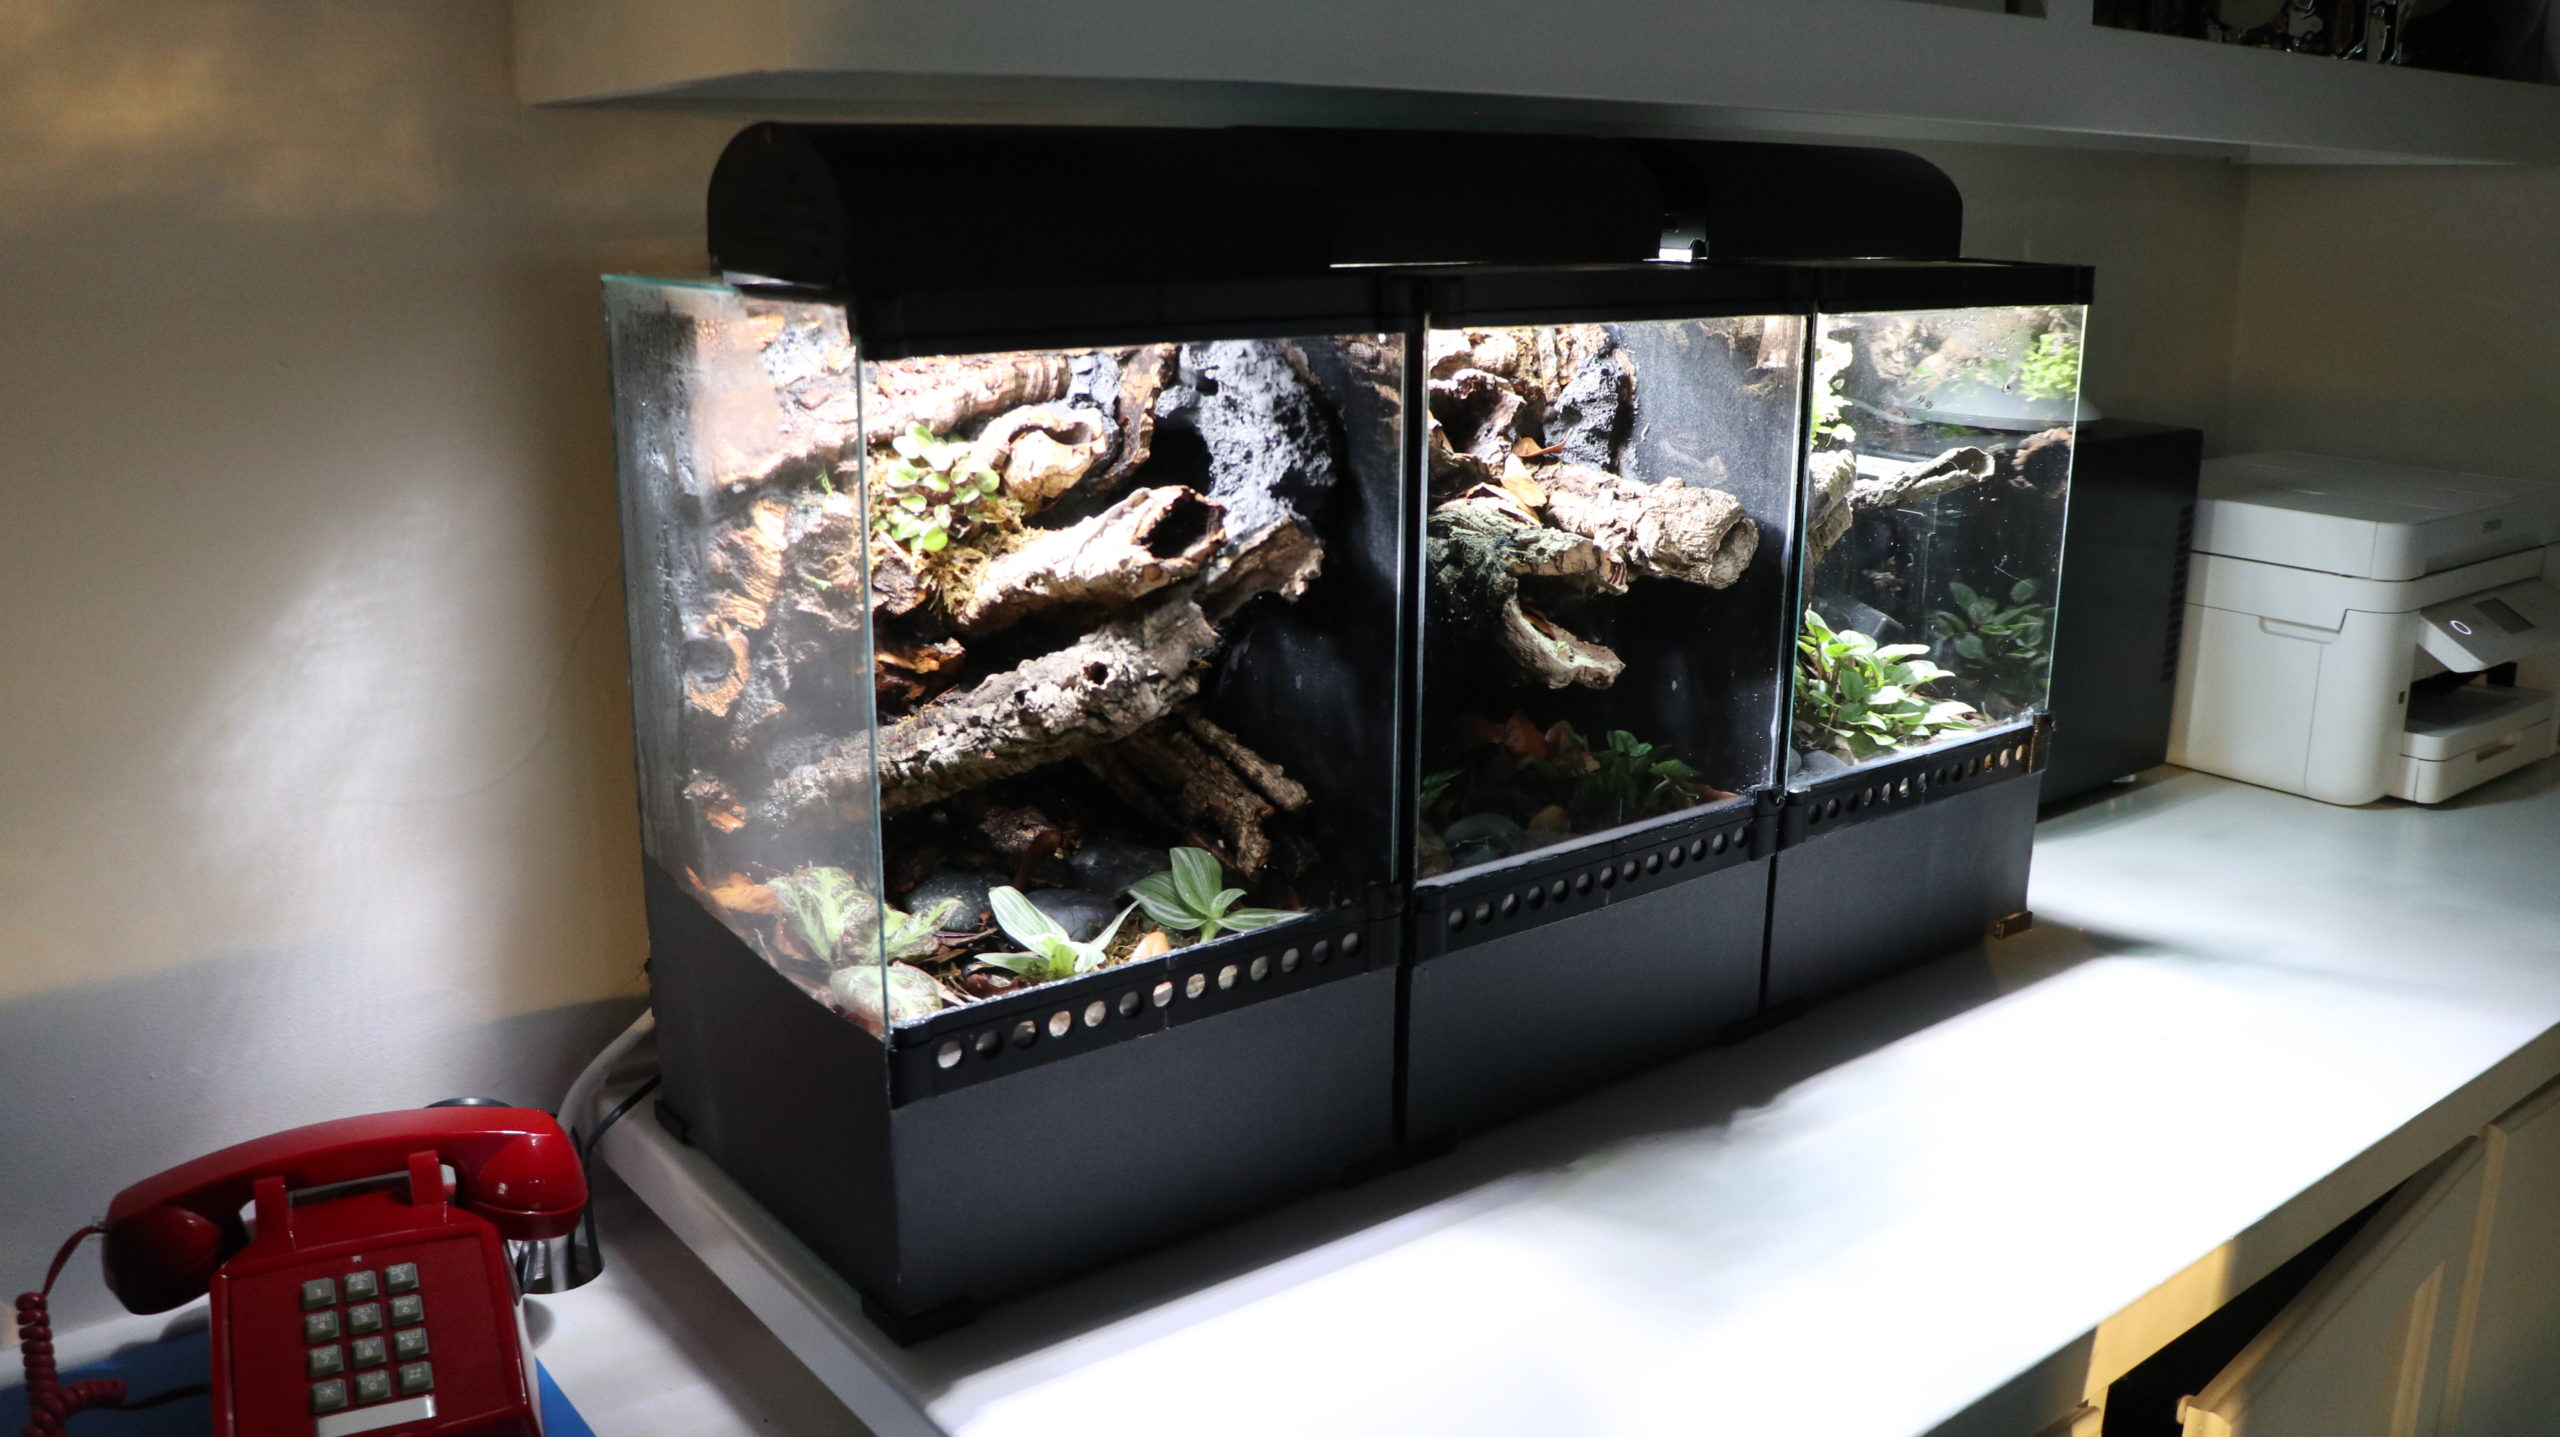
The final step was to apply black contact paper to cover the exposed false bottom and foam so the vivariums look cleaner. The three were placed side by side on my desk and I used three Zilla mini light fixtures with UVB and LED bulbs to complete the look:

critters!
The left and right vivs were inhabited at the time of this writing. Our G. vittatus are on the left, and he picked the basking cork tube as his main hide. He spends most of his day on top of this tube, retreating into it, or on the underside of it when startled (note how you can see the viv surfaces are now dry under normal conditions):


Overall the viv is working as intended. The objective was to provide a variety of choices for the inhabitants on their preferred secure hides which would encourage them to come out more. Sparky is out all day, but darts into his tube as needed.
Over time he has lots of nooks and crannies to explore in this seemingly tiny 10″x10″x16″ footprint; but the point of this entire post is that with careful thought and design, you can create a very effective hardscape that acts like a much larger footprint vivarium. Take your time designing and creating your hardscapes. This project was spread out over nearly a month, between vivarium construction, scaping, and planting.