Samsung dual monitor setup with Windows or Mac

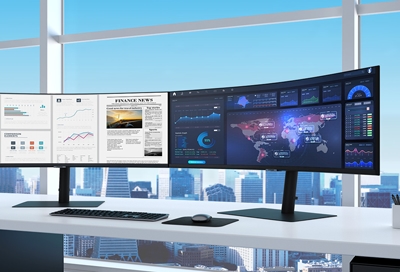
They say two heads are better than one. The same could be said about monitors. When you have two or more monitors hooked up to your computer, multitasking becomes much easier. As long as you have enough available ports to use on the computer, setting up a dual monitor workstation is as easy as connecting to a single monitor. Once you have more than one monitor connected there are some additional steps to complete the set up.
What you need to run dual or multiple monitors
Most computers are able to connect dual or multiple monitors easily by just plugging them into the available ports on the computer. It's the same way you would set up a single monitor, just with a few more steps after you've got everything hooked up.
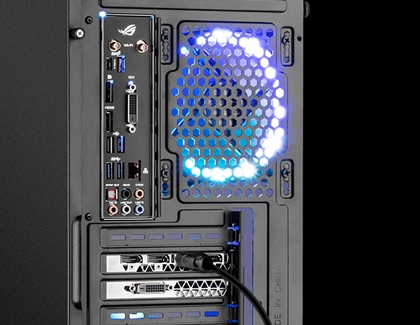
To determine how many monitors your computer can easily connect to, count the graphic ports (HDMI, DisplayPort, DVI, and VGA) or check if there is a USB-C port. If there aren't enough ports, you may be able to connect using other methods (like USB adapters), but you may exceed the amount of monitors your computer can support. On desktops, it's much more common to install an additional or better graphics card to get more ports.

Note: If you aren't sure how many monitors your computer supports, or if you have trouble getting them all to work simultaneously, contact your computer's manufacturer.
Set up dual or multiple monitors on Windows
Note: It is normal for the display to flicker momentarily when connecting a monitor or adjusting certain settings.
Once you have all your monitors plugged in, there are some additional steps to configure the arrangement of your monitors:
Right-click on your desktop, and then select Display properties or Display settings. Then, select Multiple displays, and select your desired option in the drop-down list.
Extend these displays: This lets you use both monitors and have something different on each one. One of your monitors will need to be marked as your "main" display and will be the default monitor for most Windows functions. Just select the monitor and click the checkbox to mark it as the main one.
Duplicate these displays: When using this setting, everything that is shown on one monitor will appear on the other. If the monitors have different resolutions, then all monitors with a higher resolution will be lowered to match the resolution of the monitor with the lowest resolution.
Show only on: Use this to leave multiple monitors connected at once but toggle the one(s) you're currently using. The other monitors will stay powered on but only show black or not display a video signal at all. This can be used when connecting a laptop to a better monitor without using the laptop's built-in screen. In this case, make sure your laptop is not set to turn off when you close the lid, or it will turn off the external monitor.
Scroll back to the top, and click Identify. Large numbers will appear momentarily on each monitor. Remember these numbers when making the next adjustments, or click Identify to see them again.
If any of the screens are upside down or sideways, select the screen with the matching number, and then scroll down and select the matching Display orientation:
Landscape: Use when the original bottom of the monitor is also the bottom of the displayed screen (this is the default setting). Use Landscape (Flipped) when the original bottom of the monitor is at the top of the displayed screen.
Portrait: Use when the original bottom of the monitor is on the left side of the displayed screen. Use Portrait (Flipped) when the original bottom of the monitor is at the right of the displayed screen.
Next, select the resolution of each monitor by selecting the monitor, and then adjusting the Display Resolution. Use the Recommended settings when your drivers and Windows are up-to-date.
You can arrange the monitors when using the Extend setting. Use the Identify button again to remember which is which, and then click and drag the monitors around until the diagram on the screen matches the physical arrangement of the monitors in real life. For instance, if the monitor labeled 2 is left of the monitor labeled 1, click and drag it over there.
Monitors do not have to be configured to line up exactly side by side; you can move them in any direction to reflect how they are arranged in real life. This is the case if monitors have different resolutions, since they will be different in size when arranging. After moving a monitor, click Apply and then test whether the monitors are lined up to your liking by moving your cursor from one screen to the other. The more the arrangement matches reality, the better and more natural it will feel to move from one monitor to the other.
Even if your monitors are physically far apart, they will need to be adjusted as if they were next to each other. This is because when moving from one monitor to another, there is no "space between," and your cursor immediately moves to the next monitor.
Set up dual or multiple monitors on a Mac
Note: It is normal for the display to flicker momentarily when connecting a monitor or adjusting certain settings.
Once you have all your monitors plugged in, there are some additional steps to configure the arrangement of your monitors:
Navigate to and open the Menu, and then select System Preferences. Select Displays.
Select Detect Displays. If this doesn't appear, try pressing the Option key first.
Extend the displays: Select Arrangement to use both monitors as separate displays. You can choose one monitor to be your main display for most functions.
Mirror the displays: You can select Arrangement to mirror the displays as well, so that everything on one monitor appears on the other. The monitor with a higher resolution will be lowered to match the resolution of the monitor with the lowest resolution.
You can also use these settings to set up more than two monitors. For instance, two monitors can use a mirrored display, and the third monitor can use an extended display.
You can also change the positions of the displays if you'd like. From the Arrangement tab, select one of the displays and then drag it to your desired position. You will see a red border as you move the display.
Troubleshooting a blank monitor
In the process of connecting your monitors you may reach a point where you feel everything is properly connected and turned on, but the monitor is still blank. If this occurs, see our troubleshooting guide for more information.
Other answers that might help
-
Mobile 8 AM - 12 AM EST 7 days a week
-
Home Electronics & Appliance 8 AM - 12 AM EST 7 days a week
-
IT/Computing 8 AM - 9 PM EST 7 days a week
-
Text Support 24 hours a day 7 Days a Week
Contact Samsung Support


